Walkthroughs
- by maltz
In mission 3, we fought opponents 4 times stronger than us. Mission 4 the campaign finale (there are only four missions per campaign in Heroes6) takes challenge up a whole notch. Your only enemy, the Inferno faction, owns 9 towns and 4 forts, and they will keep coming at you even if you wipe out their army again and again.
 Nonetheless, that's not where the main challenge of the mission lies. A few towns are garrisoned by some ridiculously large army, so large that they could eclipse the climax of the final boss battle. If you match that army to fight the final boss, they might actually win! Your objectives - take or destroy everything! It sounds really overwhelming.
But there are hopes - lots of hopes. Heroes6 campaigns are scripted in a way that you can frequently be crushed by scripted armies that are simply too large for now. However, these scripted armies do not grow at any noticeable rate! Your overall success is dependent on how many Inferno Forts and Towns you can bring down with a small starting army before you eventually run into a red-hot corpse incinerator. When that happens, you have to rely on your superior unit production to eventually bring you a deadly cold meat grinder yourself to take down the toughest Inferno towns.
There are two types of Inferno towns and forts: those on the surface and those underground. Those on the surface, once conquered, can be converted to Necropolis for your own benefit. Those below the surface, however, will be instantly demolished and their respective area is permanently sealed off. Your hero will be teleported back to the surface as well.
Since battles in this game usually involve stacks that can do 4 digits, if not 5 digits of damage each hit, it is a good idea to invest ability points into the passive combat category, after getting all the core abilities suggested in Mission 1 walkthrough. You should also try to raise your Magic Attack stat as much as possible, since your two most powerful ranged stacks depend on it.

Necro Campaign Mission 4
Level Cap: 30
Difficulty Index: 5/6
Last Updated: November 12, 2011
WALKTHROUGH
A good starting bonus is the "free first generic hero" bronze-level Dynasty Trait. By now, the starting levels of the generic heroes are very high, making them very expensive to hire. Give this hero and Ludmilla some economic abilities (such as the +1 Wood and Ore per day) and let them ship units to Ana. Another very good bonus at the bronze Dynasty level is "hero +3 movement" (you did pick up Logistics and Pathfinding, right?) You have lots of travelling to do.

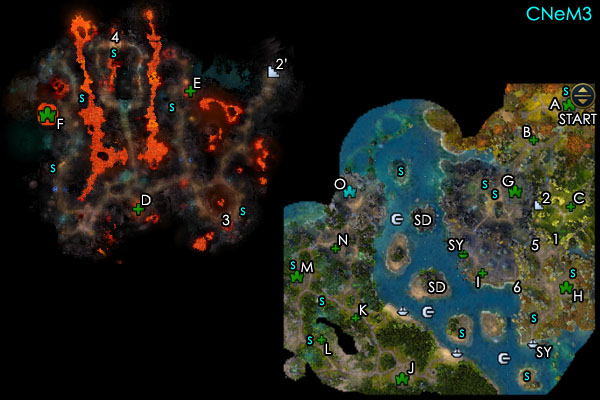
Ana starts in the SE corner with a moderately developed Town A. Start with clearing the area close to Town A and flag the resource buildings. Your top priority is to get the Archlich building. The dependable Liches will be your main power output throughout the mission.
Next you can decide to either go north or go west first. There isn't too much difference since everywhere you go, there is a Demon town or fort to conquer. I went north first, and conquered the towns in the alphabetically labeled order (Fort B, Town C.... to Town H), while tackling each underground town in the nearby area.
 In my game, I encountered very manageable resistance all the way to Town F. However, by the time I got to Fort Gand beyond, I started seeing enormous inferno army. Maybe that's a good reason to go north first. Or maybe the game will spawn the large armies in the remaining towns no matter where you go first.
You will notice scattered skeleton stacks volunteer to join your army, which contributes to a side quest requiring you to recruit 1000 skeletons. You can collect the skeletons with secondary heroes. You can only pick up a couple of hundreds for free - the others have to come from your accumulated production. This side quest actually serves as a quite accurate "timer" of the mission. In my game, I finished the mission 2 weeks before recruiting enough skeletons. So if you already finish this side quest by having 1000+ skeletons, you should have more than enough power to defeat the final boss.
Let the Blitz begin! Rush to Fort B and bring it down. Convert just the creature building, but not the Fort itself. Save those Wood and Ore to trade for Crystals to get the Weaver building ASAP. Around this area you should be able to pick up your first Moon Shard Fragment. This goes to the second side quest of the mission - collect four fragments, pick up the famous Tear of Asha, and install it in your Capital (your only Level 4 town). The location of the other three fragments are marked by (MF), and the location of the Tear of Asha is marked by Tear. One tricky fragment is located on an island that can be accessed by building a ship from the shipyard southwest of Town E (just west of the future Tear of Asha chest).
It is impossible to acquire the Tear before collecting all four fragments, unlike in Heroes5, where you can dig up the Tear even without having any piece of the map! Note that you have to have all four fragments on the same hero for the Tear chest to spawn. While having the tear installed really boosts your production, you are really better off to conquer as many weak surface Inferno towns and forts as possible at this stage, as even if you get the Tear early, you likely don't have enough resources to install it. Then, when you hit a brick wall later (such as a stack that potentially deals 15000+ damage in one hit), you can take your time to collect the fragments and the Tear.

At this time, you can expect to meet the first demon hero. They are all very aggressive - coming directly at you whenever possible. Curse of the Netherworld is perfect for this kind of small-scale encounter. Throughout this mission I fought more than 10 demon heroes on the field. Strangely, they get quickly "recycled" once they are defeated. So I keep fighting the same two or three heroes 10+ times...
 You will also see scattered Shrine of the Seven Dragons throughout the map. However, you can completely ignoring their existence and save the crystals and cash. You can easily reach the level cap without any of them. (So the shrines are not marked on the map above.) Contrary to previous hero games, the EXP curve in Heroes6 does not become very steep at very high levels. However, even after reaching the EXP cap, you can still accumulate EXP for the Dynasty Weapon (both manual and quick combat) and your Dynasty account (manual fighting only). If you feel like it, you can even come back to a previous save just to fight more neutral stacks to farm more EXP, as stacks in mission 4 are all very large and EXP-rich.
Go further north and use the portal (1) to get to the underworld. This portal leads to an isolated area at (1'). It is a good idea to make a secondary hero closely following Ana to pick up resources. As soon as you conquer the Inferno town there (all marked with T), this area will be forever sealed off and any un-collected resources are forever lost. In this area, I found an extremely useful artifact "Boots of the Wayfarer", which increases Ana's movement by 8. Other artifacts you found in this mission are likely to be of very high quality as well.
Next, go north and snatch Town C and convert it to Necropolis as soon as possible. Next, go west and capture Fort D. North of Fort D is a second portal (2) that leads you to the isolated underworld at (2'). Same drill here - demolish the demon town.
Around this time, your home base should be threatened by demon invasion. In my game, I had just enough time to take down Town D (with a very small army - the enemies at the beginning are nothing compared to those at the end) before an enemy hero invaded Town A. By building an advanced Town Portal in Town A (don't build one in Town C!), my Ana instantly returned and sent that poor hero home in no time. Unfortunately, he will be back in no time, too.

It is time to push west now. Fort E is actually very close to Town A. Next go northwest to tackle the third portal (3), leading to another isolated underworld area at (3'). Make it sink into the lava! Keep going west and soon you will see Town F. Convert it to the Dark Side! Up to now the Blitzkrieg should have worked rather perfectly - you made streamline to each target, taking everything on your way.
 In my game, when I went down to Fort G, I was greeted by 148 Pit Fiends. While the battle seemed impossible, I was still able to score a perfect victory with Puppet Master and Time Stasis. Whenever the monster stack gets too close, I PMed the huge stack and made it walk all the way to the other end of the battlefield. But that was the last cake battle for me. When I got down to the underworld area at (4)-(4'), I was greeted by an army ten times of my size. Ops. (By the way, my game frequently crashes when a PMed enemy shooter attacks an enemy unit, so be careful.)
When you finally hit the brick wall, it is a good time for Tear of Asha. After a few weeks of roaming and fighting, your army should grow significantly. Eventually you can finish the 4th and 5th underworld town at (5)-(5') with perfect victories.
A tip for these truly epic castle sieges: Do not allow any demon stack gated in front of your Liches. These gated stacks are likely huge thanks to their gigantic mother stack. Once the gating completes, your battle is pretty much over! You have to destroy the gates before the gating completes on the next turn. A reliable way to make sure that happens is to assign your Lamassu and Ghouls, by now your two weakest stacks, to be ready (wait) for gate-breaking every turn, while your other melee stacks take care of the other enemies. The Lamassu takes away 2 hit points from the gate, while the Ghoul can finish it off before the next turn arrives.
The AI will start gating when it decides that it is better off coming out the castle. Therefore, the gating activity will be accompanied by insanely powerful stacks rushing out of that castle gate. Time Stasis is your best friend here. You can try Puppet Master a super stack to hit another (for some huge damage on each other) just before their turn comes up. (If you PM too early, the AI is smart enough to dispel the PM by attacking that stack). If a huge stack reaches your Weavers, you can also use their special ability to tie them up for 2 turns. If you found a Unicorn Horn Bow, definitely use it. It will greatly enhance your ranged power when you most need it. Good luck on these battles - they could be extremely difficult.
 Your hard work on the surface is almost complete. The last area is north of the central swamp area. Strangely, I actually found a smaller army defending Town H and the final underworld area of (6)-(6'). But the location of this area both on the surface and underground suggest that they are meant to be the last obstacle. Weird.
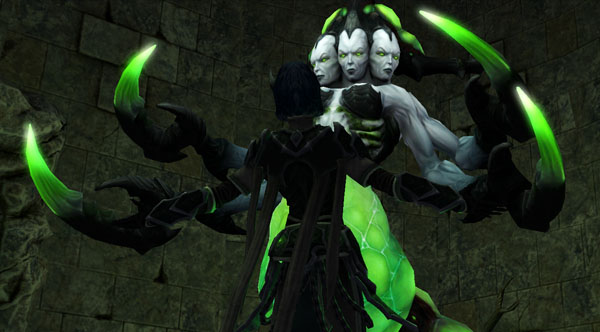
After you demolish the 6th and last underground demon town, a one-way portal appears in the middle of the swamp (7). This portal leads you to the final boss fight of the campaign. Uriel has a very long hit-point bar, measuring at 135,000, and he poses a godly, 5-digit Might Power clocked at 13,750! He is also protected by several stacks of "guards" who look like ordinary Haven units. Of course, these celestial guards, who are not really impressive in numbers, are a hundred times tougher than their human counterpart.
While this looks like a very challenging boss fight, it actually feels a lot easier than some of the castle assaults before. First, you can take your time to visit all the one-time battle bonus buildings on the surface without having a gate-camping hero to negate them all. Second, your towns should be producing an absurd number of units every week. In my game, Uriel quietly went down in just a few turns in an anti-climax "perfect loss". How's that challenge for the campaign finale?!
Indeed, if you find any battle in this mission too difficult, simply fight some neutral stacks to pass time and let your town production gives you the edge later. If you win a battle with heavy casualties, it is also a good idea to not fight it now, but to come back a few weeks later. Chances are there is another very tough battle after this, so you don't want to waste your precious cash on reviving a large number of fallen units. You need the cash to hire the next week's new recruits. By avoiding all heavy-loss fights, you might be able to use fingers on just one hand to count how many units you actually had to bring back from the Altar of Eternal Servitude throughout this mission. That's how powerful a necromancer is, or rather, how simple this game could be even on Hard difficulty. The only thing that gets hurt is your mission score (for taking longer to finish). However, you are still very likely to receive the highest rank (hero) if you play on Hard. (p.s. Currently (v1.1.1), you don't get any achievement from completing missions with a "hero" ranking.)
Anyway, congratulations for beating the Necropolis campaign! I hope you had lots of fun in those epic siege battles like I did.
- by maltz
INTRODUCTION
Your relatively safe quarter consists of 1 town and 2 forts. There are three hostile factions: Inferno (1 town + 2 forts), Stronghold (2 towns + 1 fort), and Necropolis (2 town + 3 forts). They all launch sizable invasion to your land whenever possible. There is also a friendly Necropolis faction (1 town) which you can incorporate.
How do you deal with enemies 4 times of your strength? The loading screen gives a good hint: "when you are surrounded by enemies, finish them off one by one." This is exactly what we will do here. There is a simple way to focus on only the first enemy (Inferno) at the beginning. The second enemy (Stronghold) can be crippled in a blitz. Then, with superior economic and population, it is only a matter of time to take down the last and toughest (Necropolis) faction.
While the mission has a high level cap of 24, you will have plenty of huge battles to fight to reach the level cap long before the final boss battle. Also, as you are able to unlock more buildings and creatures, you will be short on cash to recruit all available units. So it is a good practice to cash every chest.
 Necro Campaign Mission 3
Level Cap: 24
Difficulty Index: 4/6
Last Updated: November 12, 2011
BASE
If you play on Hard Difficulty, for the starting bonus it is a good investment to get the 5 Wood + 5 Ore bonus, since you would start with none of them. You want to start building your primitive town right away.
 The mission begins in the northeast corner at Town (A). Ana is given a puny army, which is much smaller than the neutral stacks nearby. However, by now your Ana build should have matured. Open every battle with Summon Earth Elemental right in front of the enemy line. With the enemies occupied with the summoned creatures, you can wear them down with Ana's direct attack.
Earth Elemental is the best among all the elementals for tanking purpose. Their special ability petrifies a stack for 2 turns, enabling you to concentrate on other enemies. They also carry a build-in Regenerate, which can be stacked with your Regenerate spell. Against living creatures, you can even slap a Life Drain on the Earth Elementals.
Whenever your mana drops to about 1/2 full, do a Meditation to refill it to the top. From now on, you will never run out of mana except for the toughest and longest boss fights (Meditation can be used only once per battle).
In your Town A, aim for the Archlich building and the Fate Weaver building (customize a market-friendly generic hero to regularly trade for gems) as soon as you can. The toughest battles of this mission and the next are almost exclusively castle assaults. Your success relies almost solely on the power of your ranged units. Great news: Life Drain also heals ranged units. The bigger your ranged stack, the more they damage, and the more they heal. The Fate Weaver (tier-7 upgraded creature) can transform into a very powerful ranged unit.
Make a round trip of your surrounding area, flag the Sawmill and Ore Pit, and head south to the neutral area to claim Fort (B). Clear everything with your Earth Elemental.
For the next step, you can either go southwest or southeast from here. If you go southwest and step in the friendly Necro territory of Town (G), you will trigger a conversation and suddenly have to face two additional enemies coming through the opened gate at (1). That's never a good idea while your army size is still miserable. Go southeast first and claim yet another neutral fort (C) and all its riches.
Now is a good time to hire a secondary hero to ship you the latest town productions to Ana. If you have reached the Bronze rank in your Dynasty, it is a good idea to pick up the "free first generic hero" trait as one of the starting bonuses in mission 3s and 4s. These generic heroes can cause a fortune at high levels.
Now your home base is secure and prospering. Let's deal with our first enemy - Inferno. Head down the stairs at (2).
INFERNO
The underworld is a very large area, with its only exit to the surface right where you are (2'). Ana will be down here for quite a few weeks, so better get used to shipping units from home. An Advanced Town Portal really helps. When you have some extra cash, hire the second secondary hero so you can ship the new units to Anna more efficiently.
 Your objective down here is to defeat the Inferno faction (as a large and difficult side quest). The demons send a constant string of quite powerful army your way. You might have to face the first invading hero not far away from (2').
Follow the paved road down and clear a small area with a creature building at (3). Then go west to take down the Inferno Fort (D). Inferno heroes might try to reclaim Fort D, so stay close to sweep the nearby neutral stack first. In my game, I actually fought a rare defensive siege battle here.
After a while, the Inferno invasion will stop. In my game, I pushed back all the way to the final town of the Inferno faction, but only managed to defeat the smaller army camped outside the gate. Then I came back to take the second Inferno Fort (E) and clear the surrounding area. You might be able to save a few days to go after Fort (E) earlier.
There is a neutral area north of Town (D). Here is a side quest which gives you the Dynasty Weapon Staff of Sandro, located at (4), and the ability to hire the Tier-5 Necropolis creature. In my game, I postponed this side quest until after I defeated the Inferno faction. I also continued using the Soulreaver staff instead of switching to Sandro's since I really like the former's +5 initiative effect. The Staff of Sandro is an enemy army debuff weapon, which, if developed, could be quite handy in very large encounters.
With 1 town and 4 forts, you are now in a great position to take on Inferno's last stand, Town (F). There are various one-time or one-week combat bonus buildings to visit, though the AI frequently deploys one additional hero at the town's entrance to negate your advantage. On the bright side, killing them also makes the army inside the town a little smaller. You can also select "Retreat" (instead of Attack) before the second battle starts, so you can renew some nearby battle bonus.

Assaulting Town (F) is by no means an easy task. It has a unique structure that deals a lot of damage (300+) to your every stack at the beginning of every turn. (And this is the only occasion in the entire Necropolis campaign that you will see it.) A lot of players reported trouble of this battle in particular. You are most likely killed faster than you can heal. If you find it too difficult, take more time to gather a larger army, since you can outproduce the Inferno faction now. Eventually, you will be able to overpower it. You can use the idle time to solve the Staff of Sandro side quest.
I tried this battle as early as I could win, and ended up losing the majority of my army, coming out with only 90% of the Ghoul stack and 12 Archliches. But here is the beauty of Necropolis - I simply go broke at Town A to raise most of the fallen units (requires the Alter of Eternal Servitude unique building)!
STRONGHOLD
Finally, you can walk Ana all the way back to the surface. When she almost reaches the exit (2'), send a secondary hero to the friendly Necro territory of Town (G) to trigger the gate at (1) to open. You are now only steps away to face the boss of the Stronghold faction.
 While you might see minor Orc heroes roaming around, your primary objective is to defeat a stationary Orc hero in front of Town (H). This is not really a difficult fight compared to Town (F). It is not even a siege battle. After winning this battle, you automatically take possession of Town (H). It will be a very underdeveloped town, though.
Two down, one to go. You should receive a message to meet with Ludmilla at Town (G). Do it as soon as possible, since that will give you another free town. On your way to Town (G), get a free look of several islands and their goodies at (5).
After completing Ludmilla's quest, you should be able to grab everything that formally belongs to her, whom personally joins your roster (don't forget to assign all of her abilities points). In my game, I could attack Town (G) but only after I loaded a save for an unrelated purpose. That gives me a fully developed free necro town. As for town development, put a priority on ranged units. All your remaining tough fights are castle sieges.
By the way, at this time you should have reached level 20, which enables you to "respecialize" all of Ana's spent ability points (one-time only). If you have wasted points into spells that you never used, this is the time to redistribute them to something else. There won't be any more "respecialize" opportunity after this.
Around this time you should start seeing oversea invasions from the hostile Necropolis faction. They like to land close to (6) and try to steal Town (H). Pretty much like the Inferno faction, they will keep coming until you make an effective counter-invasion. But let's finish local business first.
When you are done with clearing the surroundings of Ludmilla's Town (G), go southwest to claim Fort (I). It might be still under the Orc's control, or the Necro faction has stolen it from them. After finishing local businesses, load up Ana with a gigantic army and set sail! There are two shipyards (SY) you can use. Or you may actually pick up a few abandoned ships from the invading Necropolis army.
THE STRAIT OF JADE
 Before launching the final invasion on Miranda's Necropolis faction on the other end of the strait, there are quite a few things you can do on the islands - two Shrine of Seven Dragons (SD) and more stat boosts. I recommend not using the shrines at all, since you need the Blood Crystals for units, and you will have enough EXP to reach the battle cap anyway.
On the central island you will come across the strangely colored Heroes6 Phoenix (higher flame temperature, maybe?). While they seem to forget about their rebirth ability, try to avoid any melee attack on them. Each physical contact gives you a fixed amount of irreversible damage - these units are gone for good for the battle (you can still buy them back at home). Since your Ana is away from home, you don't want her to lose a sizable army on an optional neutral creature encounter. Powerful ranged stacks, combined with Time Stasis, Earth Elemental's Petrify ability should bring you perfect victories here.
Once you are done with the islands, go south to land on the other side of the Strait. There are actually two landing beaches. The southern beach leads to you to Town (J) which is probably still under the Orc's control. The northern beach leads you to a Necropolis Fort (K).
 While Ana is away, the Necropolis faction might launch more attack from the sea. It is a good idea to let a hero carry the newly recruited units for defense just in case. Ludmilla is ideal for this task. After the invasion stops, she can ship her army to Ana for the boss battle.
MIRANDA
Your first goal is to take Fort (L), followed by Town (M), which should be defended by a quite powerful Necro hero. While you want to minimize losses, you can immediately buy back the fallen units at Town (L).
You are just two steps from victory! On your way north lies Fort (N). The final fight takes place at Town (O), guarded by a very powerful Miranda. In my game she carries 110+ Fate Weavers and hundreds of other creatures. While even quick-combat assigned me the victory, when I fought this battle manually, I ended up walking out with just 20% of my army.
If you find Miranda too powerful, there are various combat bonus buildings to visit. By now your unit production should totally overwhelm Miranda's. You can pass the time by fighting some more neutral stacks to accumulate more Dynasty Weapon and your account's EXP. Eventually you will overpower the boss.
| Comments (19) |
- by maltz
INTRODUCTION
Anatasya's Mission 2 is a typical no-town journey. Used to be common in Heroes5, but this is the only one in Heroes6. There won't be any enemy hero coming after Ana, whom you navigate through stationary enemies and various scripted events. While the foes are actually much weaker than those an the end of mission 1, you are also handicapped with very limited recruit opportunities - in fact, there is not a single renewable recruitment site. once you burn a unit, it becomes greenhouse gas! You get reinforcement only from completing quests and a few one-time-only creature buildings. So don't miss out on those creature buildings because every rotting body counts.
Chances are you did not complete the objective of reaching the first Blood/Tear level in the previous mission. Worry not; you will have lots of Blood/Tear points to accomplish this objective here. It is also a good idea to manually fight battles and cast as many Life Drains as you can, so you can boost your Blood reputation and gain access to Curse of the Netherworld earlier in mission 3.
After this rather short and easy mission 2, we will be treated with a gigantic and challenging mission 3. Some of the level 15 skills/magics are vital to your initial success. It is a good idea to save up at least 2 ability points in this mission until Level 15, so you can grab Summon Earth Elemental and Meditation, and maybe Time Stasis as soon as you hit Level 15. Then you are bullet proof!
 Necro Campaign Mission 2
Level Cap: 15
Difficulty Index: 2/6
Last Updated: December 30, 2011
Dynasty Traits: There is no town and no creature growth, so you can pick something that helps with battles. You only need 15 of Wood and Ore for a quest, and there will be a lot more than 15 to pick up from the floor. On the other hand, you should collect all crystals and gold (cash all chests) in sight; they will become handy.
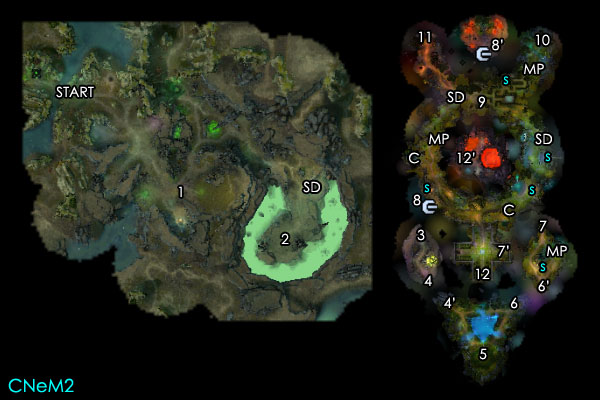
 You start on the surface at (Start). First, head west to have a little chatting and then head east. There are quite a few branches off the main road, and you can visit them all. This mission is quite easy, and there is not much time pressure. When you reach (1), you will receive a quest message to wait. I hanged around for two days before the road to the north opens up.
Keep following the winding path and you will come across a Shrine of Seven Dragons (SD). This is the counterpart of HoMM5's Sylanna's Ancient, the beloved level-up tree. But they are not so precious anymore, since there is no more exponentially increasing EXP requirement at high levels in Heroes6. You can also get an instant level at the Seven Dragons' Shrine by paying a lump sum of 10,000 gold plus 7 blood crystals. There are in total three Seven Dragon's Shrines in this mission. But there are additional usages of gold and crystals, so keep gathering them. In my game, I only used two of the three shrines, but there was still enough EXP to push Anastasya to the level cap after the final battle.
Noyr: A minor inconvenience of the Seven Draon Shrine is that your EXP is only raised to the minimum of the next level. If you are only a few battles away from the next level, fight the battles and level up first.
The surface portion of the mission ends when Ana reaches (2), and then she is irreversibly transferred into her dream world, starting at (3). Ana's dream world consists of a few isolated areas followed by a large main area. Whenever you are done with one area, speak to Jorgen in order to be teleported to the next area. For example, when you are done with this first small area, talk to Jorgen at (4) to start the next small area at (4').

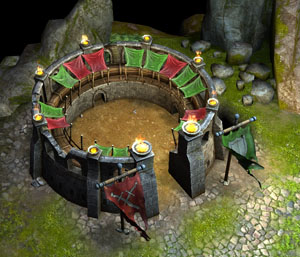
This second small area is a circular path around a pond. The primary objective here is to destroy the town at (5), which should be a very simple task. When you are done, go to (6) to speak to Jorgen and proceed.
Ana appears in the next small area at (6'). You are hinted to pick a path of Blood or Tear. Throughout the campaign this is the only place that hands out wholesale amount of Blood/Tear points.
 Pick up the stat boost (s) - the same symbols are also used to mark other stat boosts. Here you can visit the first of the three Meditation Palaces (MP). Visiting all three palaces completes a quest that gives you some powerful units. You can see the map for the location of the other two palaces. When you are done, talk to Jorgen at (7) and proceed.
Finally, you arrive at the main area at (7'). Jorgen is just to your south at (12). But as the map numbering suggests, Jorgen gives no action yet. There are some resources nearby for collecting, but not much else. Go north and enter the circular path. I suggest that you first go east to flag the first of the two Crematoriums (C). But don't go further east to tackle the Arena, as you need more troops for that battle.
Turn back and head west. Before flagging the second and last Crematorium (C), you can go through a portal at (8), which brings you to yet another small area to the north, at (8'). It certainly looks like a boss battle here, but even quick-combat gave me a perfect victory. Follow the circular path clockwise and visit the second Meditation Palace.
Follow the west route up and you can see the second Seven Dragon Shrine for another instant level. Don't go northwest yet, as the boss there is still too tough for Ana. Continue down the circular road east, and you will come across an Artifact Merchant (9), the only trade opportunity in this mission. Here you can waste away your extra cash to buy randomly generated non-set artifacts. You need only 30,000 gold to level up, so anything extra can be spent here. (Like HoMM5, non-set artifacts will not be carried over to the next mission.)
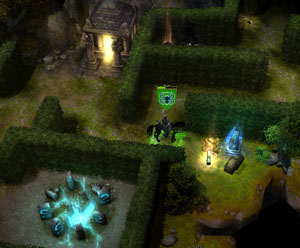 Pass the interesting garden maze (rotate the camera angle to see some hidden chests) and head northeast toward the dead-end(10). You should be able to visit the third and final Meditation Palace and finish its quest. Now is a good time to complete the circle to get another paid instant level at the third Seven Dragon's Shrine. Don't forget to train at the Arena just northeast of the first Crematorium.
Now you should have completed all side quests that provide free units. You are powerful enough to crush the army at (11) all the way to the northwest. But this is not yet the final boss, so keep your loss to minimum. When you have done everything in the main area, visit a Meditation Palace and other one-time combat bonuses, and come back to Jorgen at (12) to proceed to the last battle.
The boss fight takes place at the small area (12'). Don't worry about the meaningless resources on the floor - there won't be any use of them. If you have been keen on unit conservation, you should have no problem defeating the mission boss at all.
| Comments (8) |
- by maltz

Welcome to the Necropolis campaign. If you follow the campaign order, the Necropolis would be your first stop, which is not a bad choice. Let's start with a few basics that were not clearly explained in the tutorials.
(1) Default or Custom hero? You can play the campaign with the default or a custom hero. Since patch 1.2, you should be able to use custom heroes in the final campaigns. The walkthrough will still feature the default characters, even though some of their specialties may be less useful.
 (2) Might or Magic? You can still customize each hero's Might/Magic affinity. There are four major differences:
- Only a Might hero has access to level 3 (bottom row) Might abilities (such as the highly acclaimed Counterstrike III and Cleave). Only a Magic hero can pick level 3 Magic abilities (such as the extremely useful stack disabler Time Stasis and mana recharger Meditation). A Might hero still has access to level 1-2 Magics and vice versa.
- Might heroes have more army-oriented abilities, and are therefore better suited to command a large army than a Magic hero. However, Magic heroes have more flexibility to succeed in seeminging impossible situations. For Necropolis, magic heroes, who have high Magic Power but low Might Power, are especially powerful since two powerful ranged stacks (tier 4 and tier 7) utilizes the heroes' Magic Power instead of Might Power. However, Hereos6 campaigns usually feature a good number of Arenas and Arcane Libraries so that a Might hero will have OK Magic Power and a Magic hero will have passable Might power at the end.
- Some artifacts have Might/Magic restrictions. Same as Heroes5, artifacts that belong to a set will carry over to the next mission.
- Heroes' special abilities differ between Might and Magic heroes. For example, only a Magic Necropolis hero can eventually use Curse of the Netherworld (mass damage + mass heal) if following the Blood path. This brings us to the next point:
 (3) Blood or Tear? Usually Blood is more about offense; Tear is more about defense. But in reality you should look for powerful special abilities that you can use frequently. Besides unique hero abilities of each path, advancing levels in Blood or Tear also enhances abilities that belong to the category. For example, (Mass) Life Drain, the bread and butter spell of a Necromancer, is under Blood. The spell becomes more powerful when the hero advances further on the Blood path. While there are numerous places in the campaign to get massive Blood/Tear points, it is also a good idea to use corresponding Blood/Tear abilities frequently in battles. Each usage gives 1 reputation. It is reasonable to aim to get to Blood/Tear II by mission 3, or even during mission 2.
This walkthrough will build Anastasya into a Magic-Blood Necromancer. It is based on Hard difficulty, and the player should be able to achieve the "Hero" ranking at the end of each mission. (Same with all other subsequent walkthroughs.)
(4) Dynasty Weapons. You will pick up more Dynasty Weapons along the campaigns and by spending Dynasty Seals in My Dynasty (Seals are earned through completing achievements). Dynasty Weapons are not associated with any particular campaign hero or campaign progress. Their experiences are accumulated throughout all games where the weapon is equipped. Since higher levels of each weapon require millions of EXP, it is better to stick with a good one and develop it to its full potential.
(5) Dynasty Traits. Dynasty traits are starting bonuses available at the beginning of each map. In the game's main menu, you can buy these traits with Dynasty Seals. More traits will be available for purchase when the player's account level (Iron rank, etc.) advances. The account's EXP, like Dynasty Weapons, are also accumulated through all games. At level 11 (not 10, it is also a known issue), you will be able to purchase Bronze-rank Dynasty Traits and pick a second starting bonus. At level 21 (Silver rank) You can buy the third trait slot. But there is no way to get the 4th or 5th yet.
HERO PLANNING
During campaigns, you can respecialize (in hero's special ability tab) your main hero's abilities when he/she reaches the the next level of Blood/Tear level. (So you have two shots) - note that this is different from the scenarios, where you can respecialize at level 10 and level 20. Here comes a list of core survival abilities for Anastasya. I used them almost exclusively in the toughest fights of the campaign.
 Unit conservation tools: Life Drain, Mass Life Drain (lv5), Regenerate, Mass Regenerate (lv5), Reinforcement I, II, Tactics I. Healing spells in Heroes6 are extremely powerful - they resurrect fallen units. Reinforcement is like a "pre-heal" so you can free up later actions to heal others in need. Abuse the these abilities and you will do very well in Heroes6.
Life saver for the army deprived: Summon Earth Elemental (lv15), Time Stasis (lv15), Puppet Master (lv15).
Mana buffet: Meditation (lv15). Refill a large amount of mana once per battle. Cast it just before the battle ends.
Boss fight mass buffs/debuffs: Mass Stone Skin (lv5), Mass Weakness (Lv5). In several very tough fights, we receive more damage than we can drain/regenerate back. So we better reduce that damage. While Mass Stone Skin seems more powerful than Mass Weakness, it only reduces Might damage.
The above list of core abilities only requires 15 ability points, so plenty of extra abilites points can be invested in passive abilities that doesn't take up Anastasya's precious action during a tough battle. It is a great idea to pour extra ability points into might-oriented passive abilities such as Archery, Counterstrike, Giant Slayer, etc. Another popular choice is Logistics and Pathfinding to speed up your expansion, especially useful in later missions.
It is generally a bad idea to give your main hero any ability that is not related to battles. That's what secondary heroes are for. They only need to focus on economic (Realm) abilities. There is no need to develop a combatant secondary hero throughout all Heroes6 campaigns.
Veterans of Heroes5 may intuitively pick Dark, Nature, and Prime Magic I, II, III, etc., thinking they unlock high-tier abilities such as Summon Earth Elemental and Puppet Master. However, in Heroes6 you can pick those high-end spells without Earth magic I or Dark magic I. All they do is mildly increases your hero's respective magic school power. Since there will be numerous +Magic Power stat boosts through the campaign (my Ana's end-game Magic Power was 70+), Dark Magic I, II, III does not really make any big difference - a poor choice that wastes away precious ability points.
Leadership (Morale) and Destiny (Luck) was another popular pick back in Heroes5, but they are also poor choices in Heroes6. There will be so many adventure map buildings and cheap artifacts that increases them so much (such as 8000 gold Golden Horseshoe for +8 luck) that your ability points seem to be completely wasted. Besides, Luck's effectiveness is severaly reduced in Heroes6 - it only increases your damage by 50%, and triggers much less frequently. Morale could be handy for Haven, but is completely useless for undeads.
Still, welcome to experiment on other abilities and let us know what you find. If you can fight every single battle with 0 loss, you must have done the right thing.
 "Did you get my closest kin's consent before reviving me? Oh. He is the one who killed me." Ana's great aunt is fittingly an Embalmer. Doesn't sound very ass-kicking, though.
CREATURES
In this campaign, the vast majority of tough battles are siege battles. Therefore, ranged power is extremely important. Necropolis is fortunate to be blessed with two very powerful Magic-based ranged creatures - Lich (tier 4) and Spider (tier 7). Lich in particular will provide the most damage output throughout the campaign. Naturally, the AI also wants to get rid of them first. I hope you don't grow tired of healing them!
 A third ranged unit is the spear-throwing Skeleton (tier 1). The upgraded version's (Might-based) attack also reduces the target's next movement range by 1. The skeletons are not particularly powerful since Ana's Might Power won't be too impressive as a Magic hero. However, if you find the Unicorn Horn Bow or the Emerald Yumi Bow (both negates range penalty, the latter also negates shelter), these little guys can really shine.
Anastasya's specialty is to have +2 movement on Ghouls (tier 2), which already has quite impressive movement (and initiative). You can let them catch the enemy's ranged units off guard as they can hit almost anyone on the battle field. However, since they also make Might-based attack, they will slowly lose their star status to others.
Ghosts (tier 3) are the healers of the army, responsible for roughly half of the healing in earlier missions. Their healing power will slowly turn unimpressive later on, but their damage (Magic-based) will eventually surpass your Ghouls'. They also receive reduced physical damage. A useful unit overall.
Tier 5 (Lamassu) and tier 6 (Vampire) are where the Necropolis looks lacking. Both use Might-based attack but have unimpressive movement range, so they often stop just short of the target. The Vampires do have the best initiative of your army, and can soak up the counterstrike quite well. Lamassu (and all other 2x2 creatures) can take away 2 hit points from a demon's gate; you will appreciate that in Mission 4. So they still have their minor uses.
WALKTHROUGH

Level cap: 10
Difficulty Index: 3/6
Last updated: December 30, 2011 (v1.2)
Dynasty Traits: The starting bonus does not matter a lot. If you have +3 Core Creature growth then go for it, since almost all you will be able to hire are Core (tier 1-3) creatures.
Anastasya starts her new afterlife underground, marked by (Start). Follow the road southwest, and pick up the Ghouls and later Skeletons. Ghouls and Ghosts are your best friends of the mission, so try to minimize their loss whenever possible. You will reach the level cap long before the conclusion of this mission, so feel free to cash out some chests. By the way, if you save the game before opening a chest, you can usually get another gold amount. This does not apply to which Week you get next - they have been pre-determined. The worst week for Ana is "The Week of Living". In my first run, I got that on Week 2 and was mercilessly crushed by the very first enemy hero. After restarting, the week never came again.
 The essence of Necropolis is to constantly raise back the fallen units and eventually outlast the enemies. It is a very good idea to pick up TWO healing spells as soon as possible in order to score perfect victories on almost all minor encounters. For Ana, they are Life Drain and Regenerate. The reason you need two healing magics is that there is a cooling period for most magics, so you can't cast the same thing over and over. Some spells are limited to one cast per battle (such as Mass Regenerate). As a result, you have to pick the best moment to cast them in a tough, long battle. For Mass Regenerate, the best moment is 5 turns before the battle ends to maximize your healing. Ana's third healing ability is her racial ability, Necromancy (the button that appears beside Ana's portrait in battles), which becomes very powerful later on.
Climb up the dragon-mouth-shaped stairs (1') and emerge on the surface (1). Your goal is to capture Town A to the northeast. However, feel free to go northwest first so you do not have to return here later. Town A is defended by a weak hero with a weak army. You should be able to dispatch him easily (as long as it is not during the Week of Living).
Just east of Town A there is a status boost marked on the map by a blue s (same for others). Northwest of Town A, you can find a Mass Grave (MG). There are four more on the map, and you should visit each of them by Ana personally or the quest may bug out (v1.1.1).
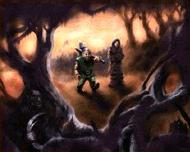
Follow the west path to the northwest and you will find another dragon-mouth stairs (3). Don't go down yet. Keep heading north to defeat a tough group of high-level creatures to claim your first hard-earned Dynasty Weapon, the Soulreaver Staff, perfect for a Magic Anastasya. The staff, which according to the loading-game screen (the first picture featured in this article), appears to be Anastasya's "official" weapon. It has a very useful ability at level 2 - a free (but mediocre) Mass Haste! Might Ana has to wait till much later for her first hard-earned Dynasty Weapon.
Use stairs (3-3') to return to the underworld. Visit the stats boost and follow the path northeast. There is a branch path to the southeast which contains resources but no enemies. Same as earlier games, it is always a good idea to have a mule hero following the main hero to pick up resources. They can also ship units, but it might be faster to Basic Town Portal the mule hero to the nearest Fort for that purpose (there won't be any "Summon Creature" spell, unfortunately). You can give the mule hero Logistics, Pathfinding, and other non-combat abilities to make him/her an effective courier, scavenger, and town manager.
 Use the portal at (4') to arrive at a little treasure plateau (4) on the surface. You can also take a sneak view of a future victim of yours. When you are done, portal back to the underworld and proceed east. Here is another stats boost and some Blood/Tear points.
Return to the surface with stairs (5'). Your goal is to capture Town B to your southwest. There is the second Mass Grave to visit on your way. There is also an Arena stats boost west of the Mass Grave. But you are too weak for the Arena now. Town B is defended by a mediocre hero, but since you have done a great job conserving units and have used a mule hero to ship new units to you, there shouldn't be any major problem. Sometimes the AI is dumb enough to send the defending hero around for errands, allowing you to steal the town easily.
It is a good idea to develop Town B into your headquarter, completed with an Advanced Town Portal and the unique structure for fallen unit revival (but reviving a unit costs more than hiring it, at about 150% of the cost). Just southeast Town B is a group of Spear Skeletons (6). They want you to locate a list, which is carried around by an enemy hero. Just keep fighting and you will get it eventually. When you get the list, return to (6) to recruit the Spear Skeletons and upgrade their structures in all towns. The upgrade structures also increase the creature growth per week. At this point, you should also get a quest to defeat the invading hero. However, in my game, the hero did not invade at all. I had to hunt him down in front of one of the towns later.
After taking Town B, you have two options. You can either travel down to attack Fort C, or go east to attack Fort D. I recommend taking C first since there is a rare Crystal mine in the territory. Depending on the strength of the resistance, you might be forced to work on the easier one first anyway. After grabbing both Forts, proceed further east from Fort D to capture Fort E. There are three more Mass Graves to visit in the area to complete the side quest.
Don't forget to convert all Creature buildings into Necropolis structures for more undead units per week for recruit. Since patch 1.2, converting Fort has become a decent investment that starts turning a profit after about two weeks.

So I loaded the autosave and avoided this battle - just passing by the town to fight some other neutral stacks on the other side. Strangely, the powerful defending hero left the town, trying to retake Fort E. This was my golden opportunity to capture Town F. With Life Drain, Regenerate, Stone Skin (cut down damage to 1/2 for 1 stack), a deep mana pool and the ever-recharging Necromancy, an almost-perfect victory against the hero-less defenders should be expected! There are also various temporary army boosts nearby, including a "water shield" structure to the east. (p.s. That powerful hero captured an undefended Fort E, but his army was only 1/5 of what I elminated in Town F. So he had no chance this time.)

A very good artifact for these low-level town siege are Summon Elemental scrolls. You might be able to find them on the adventure map, or purchase them very cheaply from an Advanced Market in a Haven town (before conversion). Summon a bunch of Elementals beside the defending Marksman to neutralize them. A trick of fighting siege battles: have superior ranged power and concentrate on killing the AI's range units until the AI sends its melee units out of the castle gate. Before that, don't fly your Spectres inside the castle to be brutely surrounded and slaughtered.
Whether Town F is in your possession or not, descend using stairs (7). Head to northeast for an Inferno-looking area to claim the Might-oriented Dynasty Weapon, Arachne at (8), and complete the corresponding secondary objective. Arachne's Life Drain passive ability at level 4 is infamously bugged (v1.2 and before) in a beneficial way. It is also one of the best Dynasty Weapons in Heroes6.
Head northwest to use Portal (9') to another underground section. There is nothing else to do but to climb up stairs (10') and return to the surface at (10). There is a final stats boost right beside you. Now go east and capture Town G! It will be another very tough fight. You might think this is the boss fight, so you can afford to lose a lot of units. Nope - this is the second last fight. So still try to raise as many fallen units back as possible. You can always resurrect them right in your converted Town G afterwards. At this point, you are too rich to care about 4- or 5-digit spending! Don't forget to convert another Barrack southeast of Town G. You can hire Lich now.

When you are ready, visit a few battle boosts and enter Portal (11) to face the boss fight of this mission. You need to win this battle in 12 turns or so. There will be lots of slapping, which promptly removes your positive buffs such as Life Drain. But before your stack attack, you can still cast Life Drain on it to get some strength back. Split out some 1-unit stacks so they absorb several initial hits and possibly counterattacks. Throw in whatever you have, keep raising the fallen with Necromancy and hope for the best. If you absolutely cannot win, come back a few weeks later with more units. In Heroes6, bosses' army grows very slowly, or in many cases do not grow AT ALL (unlike Heroes5). So you can always outgrow them providing that you have expanded well previously- this applies to every single tough battle of all campaigns. In my opinion, this feature really takes away the challenges... oh well.
Note: Do not worry if you could not complete the "reaching Blood I/Tear I" quest. It carries over to the next mission. Same as all equivalent quests in subsequent campaigns.
- by Staff
Walkthroughs
Whether you are a newcomer having problems with a particular map or a seasoned veteran aiming for the best score, walkthroughs can be useful to you. If you need any help with a scenario, browse the Round Table forums or create a new topic.
Heroes VII. | Heroes VI. | Heroes V. | Heroes IV. | Heroes III. | Dark Messiah | WoG | MM9 | MM8
Might and Magic: Heroes VII
(by Kalah)

Haven: A Dissolute Audacity | Blind Instruments of Fatality | The Blessings of Freedom | A Feast for the Gods
Academy: The Story of the Wizard and the Djinn | The Story of the Lost Daughter | The Story of Princess Ghali and the Four Suitors | The Story of The Flower of Dolor
Stronghold: A Very Ambitious Hatred | The Only Freedom a Slave Knows | No Peace in This World | True to Ourselves
Necropolis: Something Irreversible | The World Which Detachment Renounces | The Wages of Secrecy | Thoughts and Intentions | Those Last Few Steps
Sylvan: The Griefs that Fate Assigns | Perils of Waves and War | The Very Counterfeit of Death | The Portals of Flickering Dreams
Dungeon: The Fathomless Glare | The Shadows of Men's Thoughts | The Essence of Purest Poison | A World Which Now Trembles
Ivan: The Stuff of Future Memory | The Dream of What Could Be
Summary & Walkthroughs by cjlee in our Forums | Every Dog has its Day | Lost Stories
Trial by Fire - MM:H7 Standalone Pack
Walkthrough and Strategy Guide by maltz
Might and Magic: Heroes VI: Shades of Darkness
(by Mytical)

Dungeon: The Other Elves | The Call of Malassa | The Quest for the Unkown Tear | The Doom that came to Kronos
Expansion: Pirates of the Savage Sea
Tactics advice and guides available from here
Might and Magic: Heroes VI
(by maltz)
Necropolis: In the Wake of Adversity | Towards the Within | Circumradiant Dawn | The Spider's Stratagem
Haven: Something is Rotten | Fair is Foul and Foul is Fair | Tempt not a Desperate Man | A Battle Lost and Won
Sanctuary: The Fury and the Mire | The Winding Stair | The Blood-Dimmed Tide | Death-In-Life and Life-in-Death
Inferno: Angel, Angel, Burning Bright | Fearful Symmetry | In the Forests of the Night | The Marriage of Heaven and Hell
Stronghold: No Country for Orc Friends | The Good, the Bad, and the Bloody | The Barbarous Seven | A Wormful of Demons
Epilogue: Tears such as Angels Weep | Dark with Excessive Bright
(Foreign languages titles/map names are available here.)
Heroes of Might and Magic V: Tribes of the East
(by maltz)
Prologue: A Murder of Crows
Will of Asha: Last Soul Standing | The Grim Crusade | The Bull's Wake | Beasts and Bones | Heart of Darkness
To Honor Our Fathers: Collecting Bones | One Khan, One Clan | Father Sky's Fury | Mother Earth's Wisdom | Hunting the Hunter
Flying to the Rescue: Dark Ways and Deeds | Tearing the Veil | Summoning the Dragons | A Flamboyant Exit
Heroes of Might and Magic V: Hammers of Fate
(by maltz)

Freyda's Dilemma: Rebels | Suspicion | Duncan | Negociations | Choices
Wulfstan's Defiance: The Border Zone | The Ambush | The Guerrillas | The Brothers | Laszlo
Ylaya's Quest: The Spy | The Break | The Meeting | Dragons | The Decoupling
Heroes of Might and Magic V
The Queen (by Robenhagen and Angelspit): The Queen | The Rebellion | The Siege | The Trap | The Fall of the King
The Cultist (by Robenhagen and Angelspit): The Betrayal | The Promise | The Conquest | The Ship | Agrael's Decision
The Necromancer (by Rapier): The Temptation | The Attack | The Invasion | The Regicide | The Lord of Heresh
The Warlock (by Infiltrator and maltz): The Clanlord | The Expansion | The Cultists | The March | Raelag's Offer
The Ranger (by maltz and Psychobabble): The Refugees | The Emerald Ones | The Defense | The Archipelago | The Vampire Lord
The Mage (by Psychobabble): The Defiant Mage | The Liberation | The Triumvirate | The Alliance | Zehir's Hope
Dark Messiah of Might and Magic
The GameSpot Dark Messiah of Might and Magic Game Guide by Matthew Rorie is your best resource if you are stuck in the single-player levels. It can be viewed online or downloaded as a PDF. It contains general tips, an overview of all skills and a complete walkthrough of the game.
Heroes of Might and Magic IV: The Winds of War

To Rule the World (by Pepak): Anduran Foothill | Rusted Desert | Frostrift River Pass
Enough is Enough (by Angelspit): Art of Persuasion | The Sacred Vale | Wrath of Nature
Heroes of Might and Magic IV: The Gathering Storm
Masters of Magic (by H3Trio Staff)
The Isle of Pyre | Slart's Fjord | Lambent Plains | Mt. Anon | Mire of the Dead
Heroes of Might and Magic IV
The True Blade (by Steven W. Carter): The Drawing of the Blade | The Trials | The First Step of Many | Seeking the Steel | The Rightful Heir
Glory of Days Past (by Thegenesi): A New Way | A Necessary War | A King's Choice | One Tribe
Elwin and Shaera (by Steven W. Carter): Overview | The Lovers | Mark of the Tiger | True Love | Reflections | Together
A Pirate's Daughter (#1 by Plaid Dragon, #2-5 by Steven W. Carter): A Pirate's Daughter | Bloody Cove | Strait of the Lost | Bay of Maids | Never Look Back
The Price of Peace (by Steven W. Carter): At the Crossroads | Bloody Cove | The Servant | The Rainbow Crystal | An Unusual Betrayal | Slave to Fear | To Slay an Immortal | The Price of Peace
Half-Dead (by Steven W. Carter): Eater of Children | A Fiery Realm | The Points of Power | Life and Death | The Unholy Breath
Heroes of Might and Magic IV: Stand-alone Custom Maps
Hero Wanted:
Scoring tips by Pepak | Diary by Namerutan
Heroes of Might and Magic III: The Shadow of Death
(walkthroughs by Harukaba)
"There's a bug in marking completed campaigns. To make game remembering that you completed the scenario you always need to start from previous campaign final save. If you will not reload and just click to continue, it won't be checked!"

Birth of a Barbarian: On the Run | The Meeting | A Tough Start | Falor and Terwen | Returning to Bracada
Elixir of Life: Graduation Exercise | Cutthroats | Valley | Thief in the Night
Hack and Slash: Bashing Skulls | Black Sheep | A Cage in the Hand | Grave Robber
New Beginnings: Clearing the Border | After the Amulet | Retrieving the Cowl | Driving for the Boots
Rise of the Necromancer: Target | Master | Finneas Vilmar | Duke Alarice
Unholy Alliance: Harvest | Final Peace | Search for a Killer | Gathering the Legion | Secrets Revealed | Agents of Vengeance | Wrath of Sandro | Invasion | To Strive, To Seek | Barbarian Brothers | Union | The Fall of Sandro
Specter of Power: Poison Fit for a King | To Build a Tunnel | Kreegan Alliance | With Blinders On
Heroes of Might and Magic III: Armageddon's Blade
 Armageddon Blade: Catherine's Charge | Shadows of the Forest | Seeking Armageddon | Maker of Sorrows (by ithacor)
Festival of Life: Taming of the Wild (by Harakuba)
Heroes of Might and Magic III: The Restoration of Erathia
(walkthroughs by Harukaba)
Long Live the Queen: Homecoming | Guardian Angels | Griffin Cliffs
Dungeons and Devils: A Devilish Plan | Groundbreaking | Steadwick's Fall
Spoils of War: Borderlands | Goldrush | Greed
Liberation: Steadwick's Liberation | Deal with the Devil | Neutral Affairs | Tunnels & Troglodytes
Song of the Father: Safe Passage | United Front | For King and Country
Long Live the King: A Gryphon's Heart | Season of Harvest | Corporeal Punishment | From Day to Night
Seeds of Discontent: The Grail | The Road Home | Independence
In the Wake of Gods
(walkthroughs by Mitzah)

In the Wake of Gods:
The Samaritan:
Might and Magic IX
(walkthroughs by Vox Clamant)
Possible Plan | Isle of Ashes (1) | Sturmford | Drangheim | Gubberland | Thjorgard | Frosgard | Thronheim | Lindisfarne | Yorwick | Isle of Ashes (2) | Dark Passage | Arslegard
Might and Magic VIII
(walkthroughs by Vox Clamant)
- by maltz
Flying to the Rescue
M4: A Flamboyant Exit
- Map Size: Large
- Level Cap: none
- Difficulty Index: 5/5
- Last Updated: November 16, 2007, Patch v3.0
Here we come, Griffin Empire! (or Unicorn Empire? I am confused by the ending.) All your hard works will be paid off. The finale of finale is divided into four similar acts, each with its own mini-boss battle happening at town (A), (B), (C), (D). Then, Zehir take on the final boss at town (E)!
Your Zehir's build should be very complete by now, and he will be given free, huge stacks after free, huge stacks to run over everything. You should be able to keep a perfect victory record throughout the mission - that's how easy it is. However, all of the mini-boss fights in each act, which are performed by other heroes you have controlled over the campaign (or not), are on the opposite end of the spectrum. Some of them are ridiculously difficult on heroic.
 I don't like the current game design that you are not given any chance to adjust the other heroes' skills, creatures, even artifacts in this mission. The game actually equips your artifacts randomly! It is quite possible that you just can't win one or more mini-boss battles, because you were forced to use a mediocre default setup against a much tougher opponent. I also don't like the fact that Vampirism actually cures Puppet Master and Frenzy. This makes the mini-bosses (three out of four spams Puppet Master and Vampirism) invincible against Dark Magic. Just imagine Rolf with infinite mana and yourself with an army of 2/3 his size - that's what you'll see!
There are ways around the mini-boss fights, though, so don't go all the way back to C2M4 to rebuild every hero. I'll mention a couple of alternative ways that probably were the back doors purposely left open by the game developers. It is your call whether or not to take advantage them.
Here comes a few general tips for Zehir. First, don't waste movement points. The mini-bosses seems to grow a little stronger each week, so the more time you waste, the more trouble your other heroes will have. Zehir's part will be very easy after winning all four mini-boss battles. Leave all resources on the ground. You can call the FBI, er... a secondary hero to do all the clean-up work. Skip all of the unnecessary fights because you can come back for them later if you really wish.
Skip sidequests that are not conveniently located nearby. You may pick up the neutral stacks recommended in the walkthrough as a backup plan. There are various free or mercenary stacks ready to join, but you don't really have room for them all. No problem, that's what mule heroes are for!
p.s. The current game (ver 3.0) contains a potential bug (or intended feature) in the script. On higher difficulties it is very normal to lose with Kujin, and naturally players will then use Gotai to win the fight. However, the script won't function normally afterwards. Don't let Kujin die! If your Kujin dies and Gotai starts roaming around the map as Blue, the bug has happened.
Choose the Air Elemental bonus. The Phoenixes are more powerful, but you will end up discarding them. The Air Elementals, however, will be greeted by another 3 stacks and you will end up with a level-3 Hurricane. They are fast and they don't get retaliated - perfect! The Call to Arms mission special is 20 Gems + 24000 EXP for 4 Storm Giants on heroic (again, on lower difficulties you get more units). If you have too much Gems and won't lose a level, why not.
Let's jump right on to Act One!

Act One
Zehir enters the scene at (1), and a peaceful countryside is all he sees. No worry, you are in the right mission and there will be hundreds of thousands of demons. Your goal in this act is to capture three Gold Mines at (2), accessible through the stairways (a). Since two of the gold mines are locked away behind the Red & Blue Gates (G), you have to visit the Red & Blue Keymaster Tents (K) first.
The sidequest of this act is to capture two Dwarf Warrens (W), to receive the reward of a free level. Different from a Sylanna Ancient, though, the game actually makes up your difference to the next level, so try to complete the side quest when you still have a long way to go to the next level. Do not buy the Storm Giant to lower your EXP yet, though. You need the Gems!
 There are a few free stacks to be picked up, marked with yellow, small letters. On higher difficulties you actually receive more, so definitely pay a visit to them:
- Air Elementals (a) to the north of the stairway. I didn't mark the stairs because the game won't let Zehir access it. They are here just for decorative purpose.
There is a Stable (S) at the center to speed up your journey. Visit the Tavern at (3) and hire two new heroes. Try to hire the Haven heroes and mentor them to give them Expert Logistics. Make one of them to back track and pick up free resources left on the ground, and the other follow Zehir closely to carry future overflow stacks.
After visiting both Keymaster Tents, cross the bridge south and you will see a Trading Post. You don't really need it now, if you are already using a hero to pick up various resources. Ignore the one-way portal (P1) and keep going south to pick up a Dragon artifact (helm, D1). Descend through the stairway (a) to enter the Gold Mine area (2).
Flag all of the Gold Mines by unlocking the Blue and Red gates. In the meantime, use your secondary heroes to pick up as much Ore, Wood and Gem as possible - you'll need them badly. Save your game just before flagging the 3rd Gold Mine, because the first mini-boss fight is coming!
 Mini-Boss Fight (Wulfstan)
As soon as you flag the last Gold Mine, Wulfstan spawns underground with a good army, and charges directly to Town (A). The enemy hero has a lot of shooters! Definitely start the battle with Mass Confusion. If you don't have it, cast Mass Deflect Missle. If you still don't have it, oh-oh. Maybe it will be faster to go back to your last save file in C3M3?
Similar to all other tough bosses you have seen and will see, the Demon Lord spams Puppet Master to a degree you want to smash your monitor. The Seducers can also Puppet Master your stack, which further elevates your frustration level. When under PM your stack will make liberal use of your Rune resource as well. Wulfstan has very limited mana, so better put them to good use! You will be busy Cleansing the ultra annoying Puppet Master (or cast Vampirism to replace them if he learned it from Zehir), or cast Mass Haste / Mass Righteous Might. (The mini-boss loves to give you Mass Slow as well.) You can actually cleanse Slow with Rune to save turns for Wulfstan.
There are two keys to Wulfstan victory. First, block the castle entrance with your Thunder Thanes. The enemies will gate in a lot of stacks inside the castle, but that actually works to your advantage. The lightning attack of Thunder Thanes can pass down to all adjacent stacks (of one direction), so you can deal heavy damage inside a very crowded castle - so much damage that you will start laughing!
Second, make liberal use of the Runes, especially the Rune of Resurrection to resurrect 40% of fallen units (1 Ore + 1 Gem, the second time 3 Ore + 3 Gem, and then Wulfstan can refersh it) on the Thanes and any other stack that takes heavy casaulty. You have picked up a lot of Ores and Gems, so please make good use of them here. After Wulfstan's mana runs dry just use him to Refresh Runes on your key stacks. The battle bacame very easy from here.

This is actually the easiest mini-boss fight among all. After the fight, Wulfstan will be out of your control (as the Blue player), so you will not have any access to his creatures and artifacts. Hopefully you are not leaving any pieces of a great set on Wulfstan at the end of mission 3, or it is too late!
There is also a possibility that when Wulfstan has, say two weapon artifacts, the game will randomly equip one of them, which might not be the one you like. You actually have a chance to fix this. When Wulfstan just shows up, for a few seconds he is actually an Orange player under your control. Now quickly left click on a nearby ground ten times per second (just to show you tried) as if you are ordering Wulfstan to go elsewhere - he will start charging and stop to consider your order! Now you can adjust your artifacts. The same trick applies to all subsequent heroes as well.
When you gain control of Wulfstan, you can actually move him up the stairs to come to the surface! He can join Zehir's crusade but he can never go back down again (because the game assumes he is Zehir). The Inferno town (A) will stay forever. Doh. If you absolutely can't win, just park Wulfstan or the subsequent heroes outside the town gate.
Is your mission still winnable if you missed one or more of the Inferno towns underground? Actually, yes. The only town that must go down is the final boss's town (E). All of the other fights are in fact optional although the script writers tried to make it mandatory - or did they purposely leave a hole for you? We will find out more clues soon.
No matter town (A) goes down or not, Zehir is done in the Act One. Pass the one-way portal (P1) to proceed. Although it seems that you will not come back to this area, later in the mission you can learn and cast the Instant Travel spell that allows you to go back to a previous section.

Act Two
Zehir now travels to the SW quarter of the map (P1'), with an eventual goal to enter the one-way portal at (P2). This is a very straight-forward act.
Don't miss out a very important free stack, tier-6 Rakshasa Kshar (r). There are also two groups of Air Elementals (a). Similar to all other missions, on higher difficulties you actually receive more untis as the stack sizes are larger. There is a useless Tome of Summoning magic (Ts) - just in case you don't have Arcane Omniscience.
The side quest of this act is to defeat a Demon Leader (4), who actually moves around but won't go very far. Deleb is much weaker than the mini-bosses or Rolf, though. After defeating her you can get the useful artifact Boots of the Swift Journey. Save your game just before entering the one-way portal (P2). The second boss fight is taking place at the gate of town (B)!
Mini-Boss Fight (Freyda)
Both Freyda and Duncan show up, but only Freyda fights. (Duncan has no army at all.) This one probably breaks the difficulty meter on heroic - I failed so many times that I finally gave up! Well not really. There are two backup plans. Plan A: Go all the way back to mission 2 to rebuild Freyda, replay mission 3 and 4 up to this point, to possible barely make it with a Sorcery build. (Please see the end of C3M2 walkthrough).
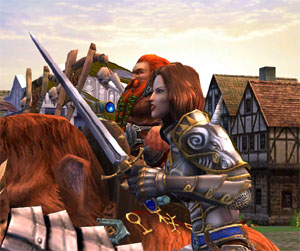 The difficulty of this battle comes from the power of the Inferno army. The enemy hero again spams Puppet Master as if he has inifinite mana (he actually does, relative to you). You will be lucky if you can cleanse the Puppet Master before your PM-ed stack wipes out another of yours. Vampirism won't help - because the opponent will instantly overwrite it with yeah, another Puppet Master. He will also overwrite your own Frenzy/Puppet Master with Vampirism, although you might get lucky to see some action. (For example, those Frenzied 40+ Archdevils kills 120+ Succubus Mistresses with a single blow).
There is no way to stop the advance of the hard-hitting Inferno army. They are simply superior to Freyda's. Your best shot is to cast any Light Magic (usually Cleansing, or some mass spells) and gamble on the free Divine Vengeance. What is your chance that it actually hits a tough stack that has bloody hands, not a stack that has not attacked you, or a 1-HP-1-unit stack leftover by Last Man Standing? You have to be very lucky to win! By the way, get rid of the Ballista with your shooters. It will fail you at the last moment.
You are burning your mana, hoping to wipe out the opponent first. It will probably go down to this - both you and the opponent have just one stack left. You are barely alive with Resurrections (if you don't have it, try plan B), and your opponent is quickly dying off from your Resurrection-Vengeances. If you are lucky, you cast another Resurrection, and your opponent dies from Divine Vengeance. Otherwise, your opponent's creature (or Ballista, even the Archer Towers) act first to wipe out your little last stack! I "almost won" a couple of times like this. ;)
If you absolutely can't win, and don't like Plan A, here comes Plan B. Similar to what you can do to Wulfstan, stop Freyda on her way in, by clicking the nearby ground during the few seconds that you have control of her. Camp her outside town (B).
By the way, It will be a really good idea to stop Freyda anyways to double-check her artifacts. I hope you didn't leave any good artifact on Duncan because they are permanently lost!
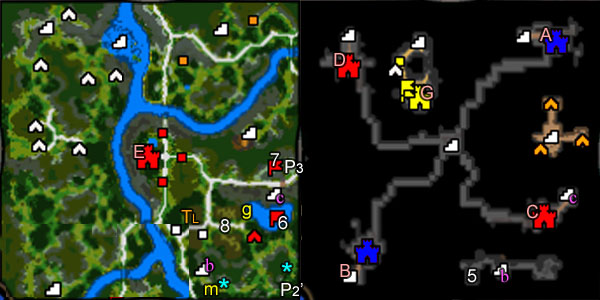
Act Three
All right, somehow you past the Freyda fight, so Zehir is now in the SE quarter of the map at (P2'). Before you proceed, you might want to complete an interesting sidequest about babies tied up in dungeon... er, to free a group of friendly Shadow Matriarchs (100 in my game) imprisoned at (5) underground. This area is accessible through the stairway (b). If you want to do it, do it at the beginning of the this Act as it will save you turns. I actually don't recommend doing this sidequest, because they are not really very helpful.
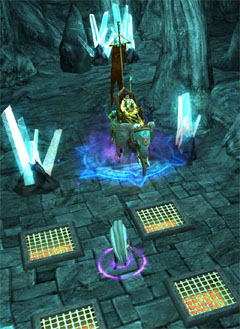 Your primary goal of this act is to defeat two Demon armies at (6) and (7), and pass the one-way portal at (P3). Both Demon armies are very weak, again.
There are two free stacks, the Magnetic Golems (m) and Obsidian Gargoyles (g). Both are pretty crappy and you don't really have any use of them. Skip them if you want.
On the busy street of (8) you can hire two groups of mercenaries, Thunder Thanes and Marksmen from Seer Huts. They are not cheap at all, and you have no use of them with Zehir. However, if your Wulfstan is still waiting outside town (A), you can buy the 35 Thunder Thanes and later let Wulfstan summon them. Well it is just my theory, though. However, if you go with "Plan B Plus" (I'll cover it soon) you don't really need to go through these troubles.
p.s. Visiting each of the Seer Hut actually triggers the deal as a sidequest, but there is no reward for completing them (you receive the troops that you paid for).
There is also an artifact merchant here. This is your only merchant on the map, so you may as well take a look to see if there is anything better than what you currently have. Just west of the Seer Huts you can pick up the second Tome - of Light Magic (TL).
Interestingly, now you actually have an oppurtunity to directly challenge the final boss, Biara in town (E). However, Biara's army is HUGE - more than anything you have seen before. There is no way you can beat her now.
Save your game just before approaching the second demon army at (7). As soon as the fight is over, the third boss fight starts!
Mini-Boss Fight (Kujin)
 Wow. Did they actually test this? Here you will see how powerless a Might army is against Expert Dark magic users. You might have seen it back in the Stronghold campaign already - but with those 6 Chieftain stacks you probably didn't really feel anything. Have you visited the Memory Mentor in C2M4 to get Shatter Dark? (Please refer to the walkthrough of C2M4.)
You will see one after one of your stacks Frenzied. I had no idea that Kujin would be the fighter here, so I didn't have Shatter Dark on her. I didn't even have Magic Resistance! I kept the Triple Flaming Ballista and... there is NO Ballista!! (There is a Ballista for all others, who don't even have a Warmachine skill.) I don't even know how to win it with my build as the game intended, and I don't want to replay all the way from C2M5 just for this... I had to stop Kujin on her way to suicide. Plan B time!
Here comes the interesting part. Maybe the game developer actually knows that you absolutely can't win on heroic unless you have prepared a good Kujin build for it, so you are generously given Gotai... with a whooping 900 Cyclops! This is THE army we have in Plan B Plus! Now you actually have many interesting choices here. I will mention the two extremes:
Plan B normal: Give 900 Cyclops to Kujin. Split the Chieftains into four stacks, and whip the Cyclops to completely demolish everything. Easy win. You can also use Gotai to fight. In my game I actually let Gotai fight and everything worked out well. However, you can't let Kujin die, then use Gotai to win. If Kujin dies the game bugs out and you won't receive the reinforcement later. Again, please keep Kujin alive!
Plan B Plus: Let Gotai keep the Cyclops, actually give Kujin's Chieftains to Gotai as well. Send Gotai out from the stairways (c), and hey, who is standing on top of the hill? Now what are you waiting for? Pass these creatures to Zehir, and beat the * out of Biara! Slap a Vampirism on the Cyclops, and whip whip whip! You should definitely try it for pure enjoyment. Besides, you receive a higher Hall of Fame score... :)

"Here, take half of my boys!" and Zehir's eyes drop out.
p.s. Strangely, Biara does not overwrite our Cyclop's Vampirism with Puppet Master although she certainly can. If you fight Biara with a smaller army she'll always cast PM as if she only knows one spell. It seems that the AI actually "gives up" when it is completely dominated.
For the walkthrough purpose let's pick the lame Plan B normal and see what happens next. March Zehir to the one-way portal (P3) and proceed!
p.s. Many interesting things will happen if you let Zehir carry those 900 Cyclops and don't fight Biara yet. Most of the neutral stacks will wet their pants, and you actually have a lot of them joining for free! With mule heroes carrying the overflow stacks you can snow ball a truck load of free troops behind you. Deposit them (or fractions of those Cyclops) into your Academy town (available soon) and you can let Freyda or whoever summon them to good use (if the spell works)! But why do you still care about Freyda if you can directly win the mission with a sea of Cyclops? Anyways, the game has broken at this point and you can break it even further. Having fun is the most important thing. :)

Act Four
You are now at (P3'), the NW quarter. As soon as you travel up to (F), you can summon Zehir's town for 35000 EXP. The sky town is almost fully loaded, and if you have installed the Tear of Asha back in mission 3, the Skyship is still there! While your town is happily producing an army for you, Zehir does not need them.
Explore the area a bit if you like. There is the third and last Tome - of Dark Magic (TD) that you probably still have no use of. There is a map maker at (C), and a Hill Fort at (H). The sidequest of the Act is to learn the Instant Travel spell at the lv-4 spell shrine at (9) underground. With this spell you can actually return to previous quarters.
 p.s. According to the game script, Biara will have two major army expansion, one in the beginning of Month 4 and the other Month 5. So as long as you fight her before Month 4, you should be fine.
Your main objective of Act Four is to defeat the Yellow Dark Elves, base in town (G) underground. You will be surprised that after all these weeks of free development, they are actually even weaker than the Soulscar clan you fought back in mission 1! The enemy hero loves Divine Vengeance, so don't shoot too much - let your Phoenix do the dirty work. Save the game just before you eliminate the Yellow (their last hero) for the fourth and last mini-boss fight!
Mini-Boss Fight (Ylaya)
On heroic this fight can be totally impossible or quite easy, depending on what the AI does. If the AI choose to camp and throw an Armagaddon to demolish your Catapult, reload the game because you have no chance at all. If the AI rushes its Devil out followed by everything else, you can win easily.
You can encourage AI to make the bad choice by slapping a Confusion on the 1120 Succubus Mistresses with your Shadow Matriarchs right after the combat starts. The AI might think its ranged power is now inferior to yours, and they have a better chance by rushing out - not really!
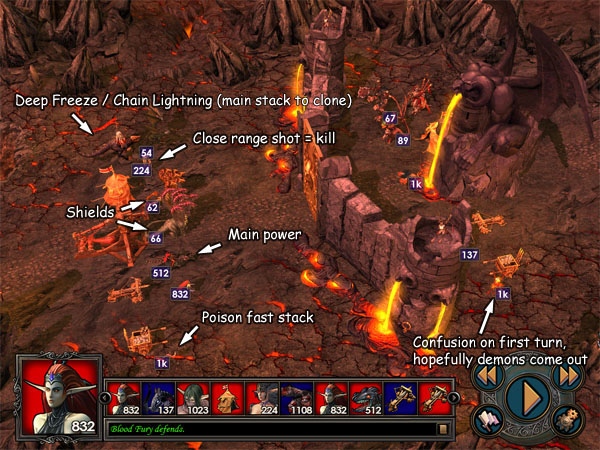
Use the two Hydra stacks as shields against the Devils and whatever comes to the gate. Position them 2 tiles before the gate, so the troops that comes out are also subject to your other stacks' spears/knives. Your Hydras will die soon but not without taking a lot of enemies with them. Your Black Dragons and especially the Tier-4 riders are the main melee force. Your assassins should poison all of the high-initiative stacks (the Dogs and the Horse), so they will die off a lot sooner while making contact with your units before the other stacks do.
The enemy hero, thanks Asha is not going to Puppet Master your riders or Shadow Matriarch, or you are done! Instead, they will set a priority on cloning that insane stack of Sucubbus Mistresses (Even Biara the Succubus does not carry this many). In my game the clones always act immediately after the hero's Phamton Force, because the enemy hero has Expert Summoning magic and his level is very high. There is no better way to prevent the damage - just use Ylaya's Chain Lightening on the main Succubus stack so the clone will be damaged next and dispelled. When there is no clone, just keep throwing Deep Freeze on the Succubus to delay their power shots.
p.s. Ylaya comes with the artifacts that boosts her Ice and Lightning damages by 50%, and she has the Master of Ice and Master of Storm feats. Therefore, Deep Freeze and Chain Lightening are the best spells to cast.
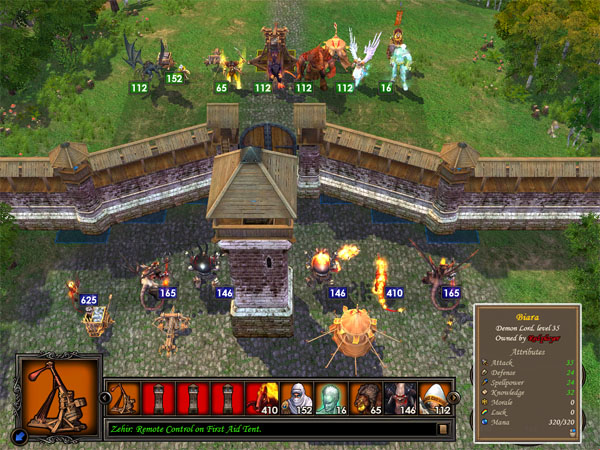
Now we are playing Heroes of Might and Magic!
Final Battle
You are now ready to fight Biara!
If you have brought down all four demon towns by Wulfstan, Freyda, Kujin (or Gotai, only if Kujin still lives) and Ylaya, a wonderful thing happens - four stacks of reinforcement arrive in front of Biara's town (E). You are entitled to 100+ Archangels, Untamed Cyclops, Lava Dragons and Black Dragons! Why do you need anything else if you have these? Well you need the Lion's Crown badly, because the Cyclops and Dragons are evil.
Also, visit all of the morale boosts you can find nearby. There are three of them out there plus a HP+10% boost, so during the fight your Untamed Cyclops and Black Dragons should have a net morale of -1. If you love to see a massacre, you can always visit the closest Memory Mentor at (10) and opt for Expert Leadership.
Biara's army is actually bigger than yours, still. She has two tier-7s, two tier-6s, one tier-5 and one tier-4. She has the Demon Lord ultimate Urgash Call, so all of them will gate instantly with almost equal number. Her stats are not as impressive as the Demon Sovereign in the original game, though, and she does not have Leadership or Luck - which actually makes her much weaker than she appears to be. From the map editor we can see that Biara actually has Expert Logistics. Ha!
Here comes the list of Biara's artifacts: Cursed Ring (Luck -2), Ring of the Broken Will (Morale -2), Staff of Sar-Issus (no magic resistance), Helm of Chaos, Dragon Scale Armor, Dragon Bone Graves, Pendant of Mastery, Shield of the Dwarven Kings, Sandro's Cloak (no mind control immunity).
Biara again loves to cast Puppet Master. Due to her artifacts they always hit, yet you can quickly dispel them thanks to Zehir's Expert Sorcery. The Mass spells in the final battle are actually very useful because Biara will only concentrate on PM, and she has no Sorcery expertise. You can freely manipulate Biara's troops - Mass Confusion, Mass Slow, Puppet Master, Frenzy, and Vampirism, Mass Haste, Mass Righteous Might on your own... the battle is very easy once you have the very best four units in the game! Even if you are not careful with your Cyclops and hit your own troops every single time, you can still win!
But, we all like 900 Cyclops better.
Congratulations for finishing Heroes of Might and Magic V: Tribes of the East expansion. We hope to see you again when HoMM6 comes out!
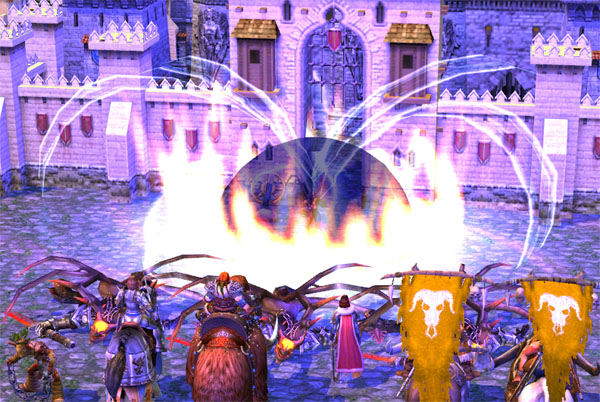
Oh here comes Isabel. Er... did Zehir find Raelag anyway?
| Comments (9) |
- by maltz
Flying to the Rescue
M3: Summoning the Dragons

- Map Size: Small
- Level Cap: none
- Difficulty Index: 3/5
- Last Updated: November 15, 2007, Patch v3.0
In this mission, Zehir teams up with yet another Hammers of Fate main hero, Wulfstan. To say they'll team up isn't very accurate. For the most part Zehir goes solo on the surface, and Wulfstan has to remain underground to swat an endless stream of flies from left and right. These flies always flee so you can't even gain experience from them! Now where is the Shackle of Last Man when you most need it?
Wulfstan starts with Expert Light magic and every Light magic on the spell book. He also has a standard might build that makes him a decent army commander. Yet you can still visit a Memory Mentor to shuffle his skills. No matter what you decide to do, keep Logistics for now, because you need it to catch up enemy heroes from both sides.

Have fun catching flies with chopsticks, Wulfstan!
If you have not, it will be a really good idea to give Zehir Arcane Omniscience now, unless you already learned the most useful high-level spells such as Summon Phoenix, Vampirism, Puppet Master, Frenzy, Word of Light, Resurrection, etc. (It is very unlikely that your Zehir has learned all of these without Arcane Omniscience.) There are many tough neutral creatures on the surface, but Zehir should be able to score perfect victories with a tiny army and a huge spell repertoire.

If you have Mentoring (which is a requirement for the ultimate), every new Dwarf hero you hire will enjoy a roller coaster ride of levels to around 17-18. You can give them Enlightenment + Scholar and the appropriate Expert Magic school(s), so you can transfer spells from Zehir to Wulfstan. Note that you can only pass down spells that are actually learned from a mage guild or vault. The spells that only becomes available through Arcane Omniscience are not transferable.
Pick the Crystal silo as the starting bonus. Mercury is only for Zehir's Call to Arms mission special: 20 Murcury + 6000 EXP for 5 Rakshasa Kshatra. This is a rather expensive and unnecessary deal, and you might not want to waste your EXP points like this. While there are already lots of Mercury production, you will be short of Ore and Crystals in this mission, especially Ore. Don't waste Ores on upgrade buildings yet, but build up the basic structures and the walls first, to start accumulating available creatures. Also, if you are like me who tried to give Wulfstan Town Portal from lv-5 mage guild - save the Ore because Town Portal spells are disabled for all Dwarven heroes in this mission. They can't even learn it.
You start out with a Dwarf town (A). Now if you chose to let Zehir to keep the Tear of Asha back in mission 2, he starts the scenario with the Tear. There will be yet another Tear of Asha to be dug up soon, so don't hesitate and install this one in town (A) to give you a head start. To the north you can take another town (B), which remains completely defenseless. Take it as soon as you can, and don't forget to flag the nearby creature buildings of town (B). If you let Duncan keep the Tear back in mission 2, you will have only the new Tear, and you have a choice of where to install the new Tear - more on this later.

You are against the Yellow dwarfs based in town (C). There is no way to wipe them out for now, and they can harass you through two 1-way portals (a') or (b'). Earlier in the mission whatever they send here will either (10%) die or (90%) flee, but later on the heroes will learn Town Portal. Watching them coming and going is quite amusing, but you can't even touch them unless you park Wulfstan within 1-day travel distance of one of the portals (I suggest (b'), since (a') is too far away from town (A)). Productions from both (A) and (B) will keep your defense sound. Just make sure Wulfstan is not too far away when multiple yellow heroes approach from two directions.
First, flag everything underground with both Zehir and Wulfstan. The Memory Mentor is just to the west (1). Pick up the Boots of Open Road (2) and put it on Zehir. The location of Tear of Asha is marked with a red (X), and you can see its exact location here (fixed spot, v3.0). If you already have the Grail structure in town (A), give the new Tear to Zehir. You can pick up the Shield of Dwarven King at (K1). There is an artifact merchant at (3); if you have the Grail structure (5000G/turn), you may as well go broke on useful artifacts.
After flagging everything underground you should start exploring the surface through the stairway at (c). Wulfstan and all dwarf heroes have to stay, says the game, so you can only let Zehir go. Before Zehir sets out, give him several dozens of cheap Fortress units (tier-1 is fine). Some battles up there are pretty tough and what Zehir was given initially might not be enough to stay alive. By the way, I find it effective to start a battle with Mass Slow (or Mass Confusion against shooters), and follow with the Phoenix or Vampirism on your HP pool stack. You then have all the sweet time to revive dead creatures.
It is a great white world up there, with maybe some blizzard going as well! Since Zehir is all alone, you can be pretty selective on targets and do not waste movement points picking up things you don't need. Generally you want to pick up all the Ores and Crystals, break through all the treasure chambers (for more Ores and Crystals), and flag all Yellow creature buildings. It is going to take quite a while.
Go west and then north. When you reach (D) the game asks you whether to sacrifice 15000 EXP for Zehir's town to be moved here. That's a big YES - you can always use another Town Hall plus the creatures to keep Zehir alive. You can also install another Tear of Asha (or maybe it is your only Tear) in Zehir's town. You might think you are rich enough, and you don't really need to waste a second Tear on an easy mission. Your Fortress army is growing from gigantic to humongous so there is no need to develop a big Academy army as well. Yes, you are right! However, even if you "waste" the Tear on Zehir's town in mission 3, the Grail building will show up in mission 4! So get the Skyship!

Yes, the ship carries over as well! Too bad you probably won't even need it there, either.
Unfortunately you cannot hire any new hero from town (D), so Zehir is still alone. From here you have different routes to choose from. Your eventual goal is to visit the Red Keymaster Tent (red R), while all of the other destinations are purely optional. The two-way portals (d-d, e-e) are usually similar to tunnels of the mountain so there is no fancy connections. Here comes list of what to do:
- There is a much needed Ore Pit at (4). You may as well flag the Sawmill and Gem Mine.
- A Hill Fort (5) is useful to upgrade and merge units.
- Get the Armor and Helm of the Dwarven King set (K2), (K3) and the Crown of Sar-Issus (S). This should complete your Dwarven King set and Sar-Issus set! Also grab the Lion's cape (L).
- There is a Dragon Eye Ring (D1) guarded by Titans, and somehow I got the 4th Dragon Teeth Necklace in 3 missions!
- A one-way portal at (f) appears to be blocked. This is not for you - but for the Yellow's cravens go through. Why can't I just split a Dwarf stack to block it? :)
If you attempt to venture underground through (g), you can see the much hated Yellow town but unfortunately your route is completely blocked by the unpronounceable Dwarf hero. (6). The game suggests you NOT to attack him (keeping him alive is actually a primary objective) but you can still attack him if you insist. Not sure what happens next, though. Maybe you can find out and tell us!
By the way, you can find a Pendent of Mastery underground at (7). There used to be a bug about it to give you unlimited resources from Artificer's resource discount. Will it work here? You are too rich to cheat here! :)

Endless Rune and Puppet Master - it is a test for a Dwarf's endurance! I started this battle in the morning and finished it at night - because I had to leave the machine on and went to work.
After visiting the Red Keymaster tent you are now ready for the boss fight. If you unlock the Red Gate (red G), Rolf (Wulfstan's bad brother) spawns with a good army of about 10 weeks of town productions. Rolf won't chase you around - he'll keep waiting. Theoretically you can run over Rolf with the biggest army even seen on HoMM5 (thanks to Asha), but you can certainly slap him with a smaller force.

But Rolf is no pushover this time. His stacks use Rune magics every turn, and apparently he has the Empathy feat so every time a high morale triggers, Rolf is moved up in action. So what is bad about Rolf's action? He has an entire spell book of Dark magic, and he will be happy to cast Puppet Master on your best stack. When Puppet Master hits (Rolf wears Sandro's Cloak, so he can even PM your Titans), Rolf's stacks will simply rune-charge up and tear your stack in pieces without being retaliated. Even if the Fortress creatures are not really effective at dealing damage, being hit from all directions every turn is not going to look good at all.
On the other hand, your Zehir has his own advantages. You have a lot more spells to choose from (you did get Arcane Omniscience, right?), good artifacts (Sar-Issus and Dwarven King) to equip, an ultra-long mana bar, various morale and luck boosts to visit before the fight, and as a last resort you have the load game button. Rolf is not Arantir, so his mana will run dry and there will be no more Puppet Master. You can also accelerate Rolf's embarrassment by going to the Memory Mentor and get the Suppress Dark feat from Dark magic (twice mana consumption).
All you need is a large stack of something that takes a long time to kill (so Rolf's mana runs out first), and then you can slowly drain back lost numbers through the ever-useful Vampirism. I used 81 Flame Lords (tier 6 creatures from Dwarf town, I should have used Thunder Thane to hit multiple stacks effectively) which were just enough to win, after failing 4 times. The difference on my 5th try was that I finally deployed other creatures (even 1-unit stacks are fine) so Rolf's creatures will use their turn on the decoys. I also setup a Blade Barrier in front of my Flame Lords to keep the huge hitters away. On the luck side, my Magic Mirror worked frequently so the several Puppet Masters were reflected to poor elementals.

No matter what creature you use, protect your main stack with decoys (and the elementals that come afterwards) to block the contact of powerful large creatures such as the Godzillas and Thunder Thane. Blade Barrier is indeed quite useful for this purpose. Phoenix isn't making a huge difference anymore, but with time it can scratch down Rolf's army with Vampirism (plus they can help you block Rolf's stacks, too). Avoid being hit by more than 3 stacks in any given turn. After Rolf runs out mana it is your Puppet Master, Frenzy and Blind time!
Surviving Rolf's Puppet Master spam is the key to victory. Here comes a trick - when I put Frenzy / Puppet Master on Rolf's stack, I was surprised to see Rolf dispel it with Vampirism. You can do this on your main stack to dispel Rolf's Puppet Master as well! Apparently, Vampirism cannot co-exist with Frenzy or Puppet Master, and the latter will overwrite the earlier, if it has a higher or equal level. (Frenzy cannot overwrite Vampirism, for example.) You can also distract Rolf by casting these spells on his own creatures, and Rolf sometimes will not Puppet Master your main stack, and cast Vampirism on his own stack to dispel yours. You are a wizard, so you are bound to win a magic duel in the long run!
Or, you can always wait and run over Rolf with a crazy army.
Preparing for Wulfstan's Final Battle
Wulfstan is going to fight in the final mission as well. It won't be an easy battle - again your opponent spams Puppet Master like he has nothing else to cast! Before Zehir goes into the portal and end the mission, here are a few things to do.
First, check your artifacts. The Dwarven King set will look good on Wulfstan, but then Zehir won't be able to access it. You may as well give all of them to Zehir since Wulfstan can function well without it. Make sure you give the Lion's Crown to Zehir, but Wulfstan can keep Lion's Cape to reach the effective morale cap of +5. Give the Runic set artifact to Wulfstan, and if you have any extra Dragon's set also give to Wulfstan. Then, move ALL carry-over artifacts in Wulfstan's (idle) inventory to Zehir's so the game won't make a stupid decision to equip the Enlightenment set in the final battle!
You should also adjust Wulfstan's skills. It is likely that the enemy heroes have fled so often that your Wulfstan remains at level 25 even at the end of the mission. Here comes my skill recommendation (also shown in the picture above):
- Expert Runelore: 3 standard feats
- Expert Attack: Tactics, Offensive Formation, Retribution
- Expert Light Magic: Master of Wrath
- Expert Dark Magic: Master of Mind
- Expert Luck: Magic Resistance, Dwarven Luck
- Basic Leadership: Runic Attunement
With Lion's Cape you still have +5 morale. If for some reason you are level 26, get another level in Leadership just to be sure. We will discuss the tactical details in the C3M4 walkthrough section.
| Comments (2) |
- by maltz
Flying to the Rescue
M2: Tearing the Veil

- Map Size: Normal
- Level Cap: none
- Difficulty Index: 2/5
- Last Updated: November 15, 2007, Patch v3.0
This mission is split into two parts, both quite easy.
It is possible to obtain Zehir's ultimate Arcane Omniscience with the help of a Sylanna Acient and a Memory Mentor. By going with the ultimate (Enlightenment, War Machine, Sorcery) you will miss the most useful mass-spells such as Mass Slow, Mass Confusion and Mass Haste, yet you gain the freedom to pick 2 other skills. You can still pick up basic Dark - Master of Mind and/or Light - Master of Wrath to keep Mass Slow and Haste. Or you can go with other useful passive skills such as Logistics.
The Call to Arms "mission special" is 3000 EXP + 20 Crystal for 20 Djinn Sultans. The Djinns are not terribly useful and they could die by huge numbers. You are given 60 crystals at the start even without the bonus, so you can afford to trade three times for 60 Djinns. However, I suggest you save all crystals (don't even trade it for other resources) because they will come in handy in the second half of the mission.
 Huston, we have a party!
Pick the 20 Djiin Sultans as the starting bonus. The 40 crystals that can give you another 40 Djiins later (by losing 6000 EXP more). Since you already have 60 crystals, there is little point to get even more.
First Half

You start the mission in front of town (A), with a mandatory battle against a small Renegade army. Use your shooter to kill some weak stacks, and the opponent hero will gate in Inferno units. The existing Haven units all switch side to be your aid, and the fight will be over very soon. Too bad you can't keep the tier-5 Zealots after the battle, because they are teleported to the "ritual ground".
Depending on what magics you picked up from Zehir's town in mission one, you can handle the neutral stacks with different strategies. If you have Vampirism / Resurrection the fights will be straight-forward - just deploy the Djiins and hack. If you have none of the above, you can still use 1-unit stacks and the Phoenix / Elementals.
There is no AI activity at all during the first half, so don't feel pressured. Go west and visit the Stable (S), and flag the mines below your town. Go north a bit and you will see a Memory Mentor on the right (1). We will come back later when your level is high enough. Collect the second stack of monks at (2) and they will go to the ritual ground. Flag / kill / collect everything on your way, including two Dragon artifacts at (D1) and (D2).

When you reach (3) the game prompts you a choice that you can spend 15000 EXP to move your town to the empty spot above. You have to do this sooner or later as this is one of the main objectives, so just say yes if it won't result in losing a necessary skill. You can collect the third, and last stack of monks at (4).
Now all you need is the Tear of Asha. It is buried underground so you will have to go down the stairs at (I). Before sending Zehir to the dungeon, upgrade the mage guilds to level 5 and see what you can learn there. I finally picked up Resurrection - which proofed to be quite useful... for about 30 minutes. By the way, don't go crazy on building other structures (you are powerful enough so the creatures don't really matter), and save 10 wood.
The underground portion is connected by a river. Beat the neutral stack guarding the Sextant, build a boat at the Shipyard and first land at (5). You can flag a Mercury Lab, and further south pick up two artifacts that will carry over to future missions - one of them being the Staff of Sar-Issus (S1, nullify enemy Magic Resistance).
Board your ship and this time sail southwest to land at (6). Here you can flag more mines and dig up the Tear of Asha (red X). You can see its exact location here. The spot is fixed as of version 3.0.

Before you go up, spend a few more days to pick up two decent ring artifacts at (7), one of them being the Ring of Speed (+20% unit initiative). Since there is no enemy action at all, you can freely explore to collect as much EXP as you can. I was able to level to 24 with the help of the Sylanna Ancient on the surface (D1 area). By the way, if you do not have the Intelligence feat under Enlightenment, now go to the Memory Mentor and get it. Your mana must be way over 200.
Now you are ready for the mini-boss battle. Give the Tear of Asha to Zehir (if he doesn't have it), and move your entire army to (8) where three stacks of monks are waiting. The ritual starts and a hero-less Inferno army shows up behind you. The size of the army looks intimidating, but it is really not that hard IF you still have mana left after those 800+ (on heroic) Imps! With a seletion of magics, my Zehir did it with just the Gargoyles as HP pool. However, feel free to waste all of your units here because you won't need any of them anymore. Since you can win rather easily, I recommend NOT to overspend on units. You are just wasting money.
After the mini-boss fight your Zehir is probably level 25 or so. If you have picked up at least one of the Witch Hut skills back in mission one, you should have more than enough skill points to go for the ultimate Arcane Omniscience at the Memory Mentor (1). There is no better time than this, since the enemy is still inactive. When you are ready, refund any artificer that you have made for your creatures, sell all of the artifacts that cannot be carried over, and march Zehir to the center of the ritual ground (8), to proceed to the second half of the mission.
p.s. After finishing the campaign, I think it would be better to replace Light Magic in the above picture with Logistics. There will be a lot of running around for Zehir, but he carries almost no army so the Mass buffs have no use at all. But of course you will switch back to Light, or even Leadership just before the final, final boss.

More useful magics! You will need them on Freyda in the last mission.
Second Half

You are now at (9) controling Freyda and Duncan, two of the main characters back in the Hammers of Fate expansion. Needless to say, they both have lost the invincibility you gave them back then. Now you are given two mediocre heroes with unsatisfactory stats for their levels (19-20), and very fail-prone skill choices. It is all right, we are going to fix their skills here.
First, answer "Cancel" to the question to NOT pass the Tear of Asha to Duncan. Zehir is leaving, but he will carry the Tear into mission 3 and 4, where the challenges are slightly harder. If you answer "OK" to keep the Tear, you can install it in your town soon. Yet this second half is easy enough even without the Grail.
The first thing you notice is that all of your resources actually carry over, including the mines you already flagged. (There is no way to travel back to Zehir's half, so you better have flagged them all.) It is likely that Zehir leaves Freyda and Duncan a huge pile of resources of every kind, so let's rush to the town and build everything like mad! Your town is (B) - as soon as you get close, the entire Blue converts to Orange. There is a huge Inferno army based in Town (D), but it won't come out yet so don't worry for now.
Here come two very good news for you. First, you can swap out the huge Renegade garrison army at (10). With this army you can pretty much dominate all neutral creatures and pick up everything. It is tempting to split the army so both Duncan and Freyda can do something meaningful, but let me tell you one secret - Duncan won't be of any use later, so don't even look at his unshaved face! Just use Duncan to run errands and give all possible experience points to Freyda. Hopefully she can reach level 26 by the end.
The second good news is there are several free Renegade armies waiting to join you. I have marked them with yellow small letters. (b= Crossbowmen, v= Vindicators, z= Zealots, and c= Champions) Pick them up as soon as you have the free slots.

There are lots things to do before Grok, the huge Inferno army based on town (D) comes out to hunt your weak heroes. Naturally you want to visit all stat boosts with Freyda (yes forget about Duncan), flag all creature buildings, defeat all neutral creatures, and collect all meaningful artifacts. I will just mention the more important attractions below:
There is a Hill Fort at (11) where you can convert the conventional upgrades to Renegade, or backwards. I suggest using all 7 tiers of Renegades to make things simpler. Your army is very powerful already.
You can pick up two more Dragon artifacts at (D3) and (D4), the latter being the third Dragon Teeth Necklace you pick up in two missions! The map maker really likes this artifact. Don't worry - they actually don't overlap with Zehir's copy and you will put them to good use on Freyda.
Rush town (C) in your earliest convenience, through the one-way portal at (II-II'). You should be able to reach it around 4-5 days after swapping the garrison at (10). The Red does not have a scripted hero there, so there won't be any good defense. The town actually crumbles after your victory, and you instantly pick up the entire Lion's Spirit set (Crown + Necklace + Cape). This is too good to be true!
Well another dream comes true - at (U) you can pick up the Unicorn Horn Bow and the Treeborn Quiver at once! This is the entire set of Archer's dream, making your shooters very, very powerful. Wow.
A Memory Mentor is again available at (12) to shuffle your Freyda's skills. I gave Freyda my favorite twilight build, a versatile build that is unlikely to fail. If you are playing on heroic, though, I start to lean towards Sorcery instead of Attack or Dark Magics. We will discuss more at the end of this page.

Build up your mage guilds and see what is offered. You have another shot at the high level spells at the Arcane Library (13). Now your huge number of crystal stock comes in handy - because each lv-5 Light magic costs 25 crystals. Hopefully you can pick up some very useful spells for Freyda.
22 days after my ownership of Town (B), Grok comes out of town (D) with his huge Demon horde. The Imps will deplete your mana no matter what, so it will be a fair army clash. This looks like the most difficult fight of the second half, but Grok fled when I lost 3 Crossbowmen and a Ballista in Quick Combat...
After taking care of Grok, the mission is essentially won and there is no more threat from Red (it will still send out weak heroes). Take your time to finalize Freyda's build, learn useful spells, visit stat boosts and collect artifacts. When you have done everything, break through the garrisons in front of town (D) and take the castle. Easy victory!
Preparing for Freyda's Final Battle
Freyda is going to representing the hostile couple in the campaign finale battle. Honestly, I have no idea how you can win that one on heroic, unless you are ultra lucky with Divine Vengeance. Anyways, let's do our best to optimize Freyda's build here.
First, equip Freyda with all of your best artifacts, because Duncan will trash everything you have on him! In my game I lost my entire Lion's set on the stupid m* *r! However, if you do not want to alter the game's flow in any possible way (you will see how to break the game in detail in the C3M4 walkthrough), give all of the other artifacts (that Freyda will not equip) to Duncan, and let him trash it! This is because the game will randomly decide what to wear for Freyda if she has, say, two cloaks, so just throw away the inferior choice. You can't risk a bad choice on heroic.
Second, reconfigure your Freyda's skills. Showing in the picture above is a standard build for Lv 25 (I hope I have never used Duncan to fight in this mission, or I might have a shot at lv 26):
- Expert Counterstrike: 3 standard feats (or - Benediction)
- Expert Leadership: Recruitment, Divine Guidance, Empathy
- Expert Attack: Battle Frenzy, Retribution (+ Archery if Lv 26)
- Expert Light Magic: Master of Wrath (or + Master of Abjuration if no Dark)
- Expert Dark Magic: Master of Mind
- Expert Luck: Magic Resistance
However, on heroic you probably want to swap out Dark Magic or Attack for Expert Sorcery + Arcane Training. If you give up Dark Magic (no Mass Confusion), you should pick up Master of Abjuration (Light) for Mass Deflect Missle (or you will feel very sorry against 290 Succubus Mistress). I still think Dark + Sorcery can work, because you can occasionally sneak in a Frenzy / Puppet Master before the enemy hero can do anything about it.
For the most of the fight, you'll still need to keep casting Light Magics (free Divine Vengeance) to kill an insane army before it kills you mercilessly. My build was far inferior to the above, and I "almost won" a couple of times out of probably 20 trials, so it is not really impossible. We will discuss more in C3M4. Good luck still!
| Comments (36) |
- by maltz
To Honor Our Fathers
M5: Hunting the Hunter
- Map Size: Large
- Level Cap: none
- Difficulty Index: 4/5
- Last Updated: November 9, 2007, Patch v3.0

The mighty Stronghold campaign reaches its climax in a one-against-all fashion. Your opponents are three allied AI players with a total of 6 towns! Can you survive?
Your starting town (A) is in a relatively safe corner. To your west is a neutral Stronghold town (B) that you have to develop sooner or later to shift the balance of power. There is also a Tear of Asha to be dug up to beef up your creature growth and bank account.
To your south is a Teal, Necro AI player based in town (C). You might recall that Kujin has cleared doubts with Arantir, so the Necromancers should be your trusted new friend. Nah. They are here just to make your life miserable, and you can expect a Teal army backstabbing town (A) as soon as Gotai goes away. Although there are some huge neutral blocking stacks separating you two, the AI heroes start with pretty high level and their town builds fast. So they usually have no problem knocking on your door early on. By the way, all neutral stacks are huge in this mission, which is quite exciting.
On the opposite end of the Teal Necro is the Red Haven based in town (E). If you think Kujin has also talked to the Knights so they should be at peace, wrong again. The Red fraction has no territory to distract their attention to, so they have to come after you!

Alaric's head is actually out of Gotai's strike zone. Better swing low!
In the dead center of the map is town (D), one of the four towns of the Orange Academy. Its strategic location allows the owner of this town to threaten all others - or to be threatened. There are three Orange garrisons surrounding town (D) that the Teal and Red players have full access through - not you, of course. The Orange has three other towns (F), (G), and (H) south from here along the paved road. Your eventual goal is to take town (H).
It doesn't look too bad, you might think. You've got Gotai and Kujin, right? You built a versatile Kujin during mission 2 and 4, and picked up nice artifacts such as the Lion's set, the Runic set, the Enlightenment set and various pieces of the Dragon set. Kujin also has Triple Flaming Ballista so she does not need a large army to thrive. You can make her a reliable home protector. You can pass on the war cries that Gotai missed...
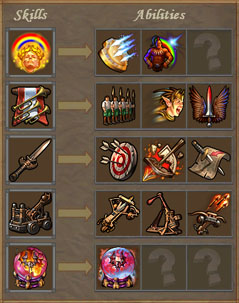
Actually, mission 4 was the last time that you ever see Kujin in the Orc campaign! To think back, Gotai was all alone in the campaign since mission 1. I hope you did spend some time with Gotai to pick up the good artifacts (especially the Lion's set and the two Drwaven King pieces), and gave him Triple Flaming Ballista. Plus you did win a coin flip to receive Fear My Roar back in your only town in two previous missions. They are all very useful in this mission, especially early on.
Here is my Gotai's skill setup later in the mission. Pretty standard Might build and I gave up the ultimate in exchange of theTriple Flaming Ballista and Aura of Swiftness. Shatter Dark, which is recommended by many forum users, was completely wasted with my strategy of the last battles, so I could have kept Shouting, or gone with something more useful, probably Logistics + Path Finding to speed things up a little bit.
This mission is quite difficult to boot. At first, I followed the conventional approach to flag nearby mines and gather scattering treasures. However, since each AI is given a decent hero on Day 1, all of them (as well as any other new recruits carrying fresh troops) immediately rushed me in a constant stream from two directions. The main Teal, Red and Orange hero all approached my town during week 1. (This is quite similar to Raelag's "The Conquest".) I was destined to defend the town forever 1 against 6. So I restarted the mission and took an ultra-aggressive approach that the walkthrough is based on.
To follow this walkthrough your Gotai must have Triple Flaming Ballista (very useful early on) and preferably Fear my Roar. There should be other ways to win this mission, so have fun discovering them yourself!
By the way, it is normal that the Orange AI takes very, very long turns. Even on a fast PC it might take half a minute.
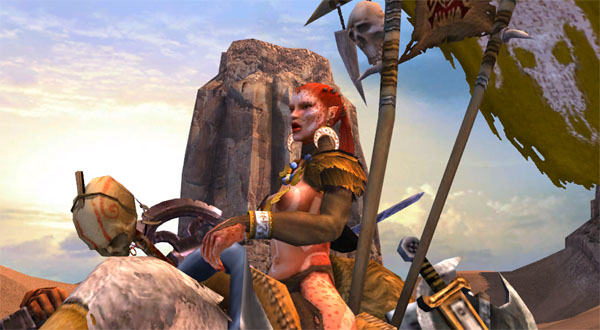
Nival tricked us! We want Kujin!
First off, pick the 2 Cyclop bonus. Go to your tavern and hopefully you can hire the guy with ~ 30 Centaurs for 2500G. Give everything you have to Gotai and attack the neutral stack blocking between the Teal and you at (1). Your Ballista is doing all the work here, and in my game I actually deployed 6 x 1 Goblins to win this one. We are aiming at Teal's town (C), so rush straight to the castle. The Teal hero might come directly to you thinking you are weak, but he forgot that you have The Ballista. You should be able to take town (C) around Day 5 even without Logistics. One down, five more to go!
Around this time the Orange and Red should be coming your way. In my game I did not give any Centaur to Gotai to fit for one more stack of Goblin, so an Orange hero actually attacked Gotai in Town (C). I had only 50+ Goblins with Gotai and had to completely rely on the Ballista. The two Dwarven artifacts cut down a lot of spell damages for me and prevented the Goblins from switching sides. (I should have given Gotai all the Centaurs!)

Note: In the real world, X-proof is even more powerful than X-resistant. Now everybody is confused by the spell "proof" term used in Barbarian Luck (5% proof per Luck) and and Dwarven King artifact set (40% proof when you equip 2). Spell "proof" here actually means damage reduction. This is totally different from spell "resistance", which means a spell won't work at all, and in the game it usually comes with a chance for it to happen. For 100% resistance the game calls it "immunity".
At the same time my Stronghold town (A) was threatened by another Orange hero, and a decent Red army was still coming towards town (C). I decided to give up the new Necro town and Town Portal Gotai back to save the HQ. Interestingly, the Red hero decided to just flag the Skeleton buildings in front of town (C), ignored the town and went after Gotai in town (A). Needless to say The Ballista took care of both heroes. Even if you do lose town (C) to Red, you can take care of the Orange army first, and come down again to reclaim town (C) from Red.
Your next goal is to take down town (D). There are two routes to it; you can either go west through the grassland and pass the north garrison (2n), or return to town (C) and head west, to pass the east garrison (2e). I picked the latter to better protect town (C), my double Gold Mine. Send a secondary hero after Gotai to flag the resource mines and collect stuff on the ground whenever safe. The Mercury Lab just west of the garrison (2e) is very useful. With the Ballista and some 1-stack Goblins you should have no problem.
You should be able to take town (D) during week 2, with some reasonable loss of your Centaurs. Two down! Temporarily the Orange heroes are not coming anymore, so you can concentrate on Red.
There are roaming Red heroes around, so let's take care of town (E) immediately. Rush straight to town (E), which is probably poorly defended because all the armies are out there. While you are rushing towards town (E) the Red heroes could be a threat to any of your other towns, but fortunately they all somehow tried to run back to defend the town instead of claiming one of your own. Of course, they will be late. Three down!

The problem actually comes after you take town (E). The Red heroes are now free to chase your weak heroes, even occupying your undefended towns. I sacrificed a weak hero to lure away two Red armies into the Orange territory to buy Gotai a few turns to return to Town (D). The AI took the bait, and even better, if an AI is town-less when the new week comes, they are considered to have lost the game and all of their remaining heroes are erased. Goodbye to Red!
You are now a happy owner of 4 towns in three weeks. Your income should be 10000+ G/turn, and even if you have not flagged the rare resource mines, the 5000G silos from each town should cover it. There is a nearby Sulfur Pit east of town (E).
With a healthy income and bottle neck defense, your nail-biting days are over. Run Gotai to take the second Stronghold town (B) now, flag the high-level creature building (3), and ship new units to Gotai with some mule heroes. Troop shipping is critical early in the mission, and you should establish a constant stream of supplies with multiple low-level heroes. I have marked the Stables with (S), which are conveniently located along the way. Here are my recommended upgrades:
Tier 1: Goblin Trapper. You will kill the casters before they can act anyways, so there is no use of the Witch Doctors.
Tier 2: Centaur Nomad. Again, if you let a stack reach them you have made a mistake.
Tier 3: None Use the non-upgraded Warriors early on. When you have Chieftains free up this slot for them.
Tier 4: Sky Daughter. After Hasting the Cyclops and Centaurs or slowing a key stack, your battle is usually over. No need for close-range melee power.
Tier 5: Chieftain. When you have more than 50, split them up into two stacks. Their only job is to whip your Centaurs or Cyclops.
Tier 6: PaoKai. Since you have so much cash you may as well buy them all. They are not terribly useful, though.
Tier 7: Untamed Cyclop. With unprecedented crude power, this is the most crucial creature in the final battles.It is also now a good time to dig up the Tear of Asha. You probably have visited quite a few obelisks so far, so where is it? You can click on the picture below to find out. The location is actually fixed (at least in the current patch, v3.0) so you will find the tear at exactly the same spot. Ship the Tear back to your starting town (A), not (B), to build the Grail structure there. There is an obvious reason for this later.

Since the Orange still owns three towns, they remain a potential threat. When Gotai receive the next shipment of units, with about 200 Centaurs, you should be able rush town (E) and (F) in a row. The AIs are more powerful now and their Divine Vengeance can usually kill a large portion of your Centaurs. There is nothing you can do about it (remember to equip two Dwarven King artifacts) - so just bite it and gladly take over the new towns. (By the way, you can sell unwanted artifacts in the Market Place of Academy towns. I never knew about that!)
Now the Orange has only town (G) left and you are holding them to the throat. The Orange AI will still send out scout heroes to annoy you, but more often than not they will get stuck by their own caravan right in front of their town - for weeks! It is time to explore the map and pick up the goodies, and allow your speedy town production to give you the superior army.
It is very tedious to ship troop to town (G) all the way from town (A). It is possible to cut it short significantly with two sets of two-way portals (a-a, b-b). Each set is guarded by a very threatening group of creatures (like 80 Titans) that you probably don't want to fight until your army size has grown up significantly.
After witnessing how powerful Cyclops + Chieftains are back in mission 3, you can take the tactics to extreme here. Deploy nothing but Untamed Cyclops and Chieftains, and split up the Chieftains into 6 equal stacks. The Chiefs do nothing but to whip the Cyclops repeatedly. Now if you ever doubt how useful this tactics is, you can take a sneak look of what's happening in the final battle. Convinced? Now rush up your Cyclops to bash the Titans non-stop! Use the area attack well and you can damage two stacks at once. If Gotai's turn come up, either throw a Call of Blood to the Cyclops, or whip them yourself if a huge Titan stack's turn is coming up next. You will be amazed by how fast these Titans go down!
As usual here comes a list of attractions. You don't have to visit them in this order and I actually skipped almost all of the fights that does not lead to an useful artifact or a stat boost. You will end up at around level 30 and it is more than enough to win.
Around town (A): There is a Boots of the Open Road at (4) to speed up your desert trip later on. The Boots of Swift Journey, which is also very handy, is found at (5) just beside a useless Hill Fort. Note that the movement bonus from these boots is added to your hero at the beginning of each turn, so you have to end the previous turn with the appropriate boots already equipped. However, after the new turn starts, you may remove the boots and put on your "battle boots" to receive the bonus from both!
Around town (B): If you took town (B) before the Haven town (E), you would receive a secondary objective of taking town (E). Otherwise no such objective is given at all. In (D1) you should be able to pick up the Dragon Scale Shield (of the Dragon set). The Dragon Flame Tongue (weapon of the Dragon set) is found at (D2). There is an artifact merchant at (7), which I picked up a good Ring of Speed (+20% Initiative to all units). The treasures that your Goblin friend tells you about is the area with a Sylanna Ancient at (8).
Around town (C): There is a two-way portal at (c), which takes you to an isolated area at the NW corner with some random artifacts.
Around town (D): The Tear of Asha is marked with the red X. There is a large desert area to the east, where you can find a Pyramid but you can't learn spells anyways. To the very east part of the desert you can find the Robe of Sar Issus, which is completely useless to you so I am not going to mark it. There is also a Sphinx just south of the bridge, but when I approached it with Gotai, it was not interested in playing games.
Around town (E): Flag the Lighthouse (9), which speeds up your journey on the river. You can build a ship in the shipyard just east of town (G) at (10). With the ship you can access a few areas off the river shore.

Around town (F): There is a large optional area north of Town (F). In there you can find a Memory Mentor (11), and another two-way portal (d) leading you to a treasure area in the middle of the desert, where more random artifacts can be collected. There are just so many artifacts in the mission, and 95% of them are totally useless. But if you ever feel you want more, there is a Dragon Utopia directly below town (F).
At (12) hides a sidequest about recycling machine parts. Come here with at least 1 Gremlin (upgraded or not, does not matter) to repair the scattered golem torsos and limbs. The Golems are repaired, and to show their gratitude they will all offer service to the Skywalker! By the time I took them during month 3, I collected a grand total of 2550 Iron Golems! I spent a lot of cash upgrading them, but since they are so slow (initative = 7) I didn't use them at all. I guess if you are seriously screwed in one of the final battles, these guys can survive long enough to save your day. Just SE of the Golems (13) you can find two interesting artifacts, the Crown of Sar-Issus and the Cloak of the Death's Shadow (enemy's morale, luck -2, as featured in Arantir's campaign).
Around town (G): There is another artifact merchant to the south, at (14). With the ship (or the Instant Travel spell) you can access the two-way portal at (e). Just north of the portal (e) lies the Staff of Netherworld (enemy creature initiatives -20%) of the Death Embrace set. The portal leads you to yet another isolated treasure area with some stat boosts and an Astrologers Tower.
Around town (H): You can attack town (H) via an alternative route by landing at (15) and go around the desert to collect three more stat boosts. There is another Memory Mentor (16) just before town (H).

Let's talk about the artifact setup a bit. There are different approaches to the final battles, and the way I like the best is the non-stop whipping action from Cyclops + 6 Chieftains. Therefore, all I need is high Initiative and Attack. You can use the Lion's Spirit set if you have all three, to give Gotai the Empathy effect, even if your Morale and Luck is already shooting through the effective cap of 5. (Empathy: Whenever a friendly stack has a high morale, the hero's ATB is moved up by 10%.) You can also let Gotai whip the Cyclops although it is going to hurt much more. Well, long pain is not as good as short pain!
The two Dwarven artifacts are pretty decent for their magic damage reduction and immunity to Slow. Also, you can equip quite a few pieces from the Dragon's set that you have been collecting here and there. Its set bonus statement might be misleading - the HP and stat bonus only applies to Tier-7 units (Cyclops), not all 7 tiers of units. Since we are using the Cyclops to bash everything up, this bonus is actually quite nice! You can easily buy other useful artifacts to fill up the rest, either from the merchants or the Academy towns.
Take your time to accumulate a powerful army. The ideal timing to attack town (H) is when you have about 250-300 Chieftains, and you should have 60+ Untamed Cyclops to go with it. So what about the rest of the army? You really don't need them. Keep whipping the Cyclops, and they will smash the world for you! I have seen people reporting the wizard hero in Town (H) casting annoying Frenzy / Puppet Master non-stop. With this Cyclop + 6 Chieftain strategy, the enemy hero hardly has a chance to cast anything. In my game the battle was over before the enemy hero even acted! You can download my replay here.
Immediately after claiming town (G) the real final boss of the campaign, Alaric, arrives just NE of (7). Alaric is a walking little guy just like Nicolai. Although he is a small man, he does have good stats and skills plus a powerful army. Alaric can reach your town (B) when his turn comes up, so in my game I used a mule hero to evacuate the entire town. This is why I suggest to get the Tear of Asha building in town (A), or Aleric will get it!
Obviously you now rush Gotai back to finish Alaric off. If you are absolutely afraid of Divine Vengeance, now go to the Memory Mentor (16) and get Expert Shatter Light. Personally I don't think it is necessary because you are so powerful now - take a look at your Gotai's stats. There is a +15 bonus on all four categories! He hits harder than the Demon Sovereign, the boss of boss in the original HoMM5!
With the set of two-way portals (a-a and b-b) and your Town Portal spell, you should reach Alaric after just a few days. Alaric's army is roughly the same size as the town (H) garrison, but he has better defense and the annoying "last man standing" feat. It is inevitable that your Cyclop will swallow 1 shot of Divine Vengeance from Alaric, even another one from the Seraphs if you don't finish that last one (with 1 HP) in time. Your Rage points should absorb most of the damage. With 6 Chieftains Alaric only acted once, still. Here is the replay.
Congratulations of finishing this quite-difficult campaign! I have a feeling that Nival is going to seriously nerf the insanely-powerful 1-Cyclop-6-Chieftain tactics in a coming patch, so have fun when it still works!
p.s. I have heard people reporting a minor bug. If you finish Gotai's turn on the door step of Town (H), the game crashes.


| Comments (61) |
- by maltz
To Honor Our Fathers
M4: Mother Earth's Wisdom

- Map Size: Normal
- Level Cap: 26
- Difficulty Index: 1/5
- Last Updated: November 9, 2007, Patch v3.0

Again we are back as Kujin, but this time her job is a lot simpler. This is a typical solo scenario where your lone hero eventually travels to every corner of the map through a unrealistically winding pass that eventually utilize the entire map, and witness every scripted event along the way. It seems that a lot of Mission 4s are designed this way (Markal, Raelag, Findan, Fredya, Wulfstan, and now Kujin), too!
Good news first - all Stronghold stacks will join you for free, and they come in great numbers! There is no time pressure except that neutral creatures grow every week - but so is your Stronghold reinforcement. Even if you are terrible at troop conservation, you will still have enough troops to beat a very easy mission boss.
Therefore, the bad news is this mission has no challenge at all.
Generally speaking, you want to fight as much enemies as possible to level up Kujin to the cap before the final battle. In my game, I fought everything reasonable (skipped almost all of the shooters/casters), and was able to cap Kujin just before the boss battle. The resources on the ground are not useful at all - there is no quest using them. However, you do need some cash at the end to upgrade units and to buy artifacts, so pick up the gold bars if it is not too much trouble. Cash out the smaller chests as well. In my game I actually picked up a lot of resources, and I had a 30K leftover in the bank when the mission ends. So you can probably skip ~30K worth of resources on the ground to speed things up.

The starting bonuses are about the same. I picked the 10 Centaur bonus to add to Kujin's little starting stack of 15. Follow the obvious road south and pick the easier battles. Defeat a tiny stack of Devils to enter the first quarter of the map. You can see a broken bridge at (1), which would have led you straight to the exit! Now you have to take the longer path. This mission is divided into four quarters, and each one has its own objective and sometimes an optional quest. When you meet the main objective, find a Seer Hut to teleport Kujin to the next quarter.
First Quarter (NE)
On higher difficulty it is likely that your starting army is too weak do take on anything major. Do yourself a favor and go straight to the Stronghold creatures (all reinforcement are marked with lower-cased yellow letters): Earth Daughters (d) and Warriors (w) just to the east. After picking them up you should be powerful enough to beat everything in this quarter. But still, for troop conservation you don't want to fight the shooters and casters unless they guard something you really want.
Make sure to visit the Red Keymaster tent (red K). Just south of the tent is a hidden path in the forest, leading you to a Dragon artifact (helm) at (D1). When you are ready, go to the Seer Hut at (2) to jump to the next quarter, at (2').
Second Quarter (SE)

Go straight north to pick up a large group of Centaurs (c). Note that your reinforcement stacks also grow every week, so if you arrive at a stack on Day 7 of a given week, end the turn and pick them up on the next turn/week. I picked up 11 more Centaurs here just by wasting a tiny fraction of Kujin's daily movement. Keep going north and you will notice a Red Gate (G) to the east. Unlock it and VOALA - the most powerful might artifact on lower middle earth -- the Lion's Crown (morale + 2, luck + 2)! BOOOO! This is too easy compared to the 360+ Titans in the last mission.
To the north of the Lion's Crown await lots of Goblins (g) to join you. Further north you will notice an Imp (yeah, 1 Imp) guarding a Dragon artifact (D2). It can't be this easy, right? Actually when you get close, your exit will be sealed by a stack Succubus, but you can still get the artifact! With enough Rage Points, you won't lose a lot of Centaurs (probably single digit).
Let's sweep the lake in a counter-clockwise fashion. Go west and visit a mana x 2 spring at (3). Further west you can see a Seer Hut at (4). This Seer tells you to kill at least one assassin in exchange of the Tarot card artifact, which is mandatory to pass the second quarter. You have no other choice than accepting the quest and hunt down the assassins - they are conveniently located just SE of the hut. Report back at the hut to receive the Tarot Card. You can also recruit a tiny stack of Wyverns (y) at the center of the shallow lake.
Just south of the Seer Hut is a Blue Keymaster (blue K). Pay a visit and pick up some more Warriors (w) just south of it. Next march east to grab the free Goblins (g). At (5) a cutscene plays and you discover that Kujin is really not, again, Biara. :) Go to the Seer Hut at (6) to finish up this quarter.

Suddenly the Orcs and Humans have reached a truce - yeah? (See mission 5 for more.)
Third Quarter (SW)
You start at (6'). Immediate to your north is the long-awaited Siege Workshop if you have Triple Flaming Ballista. If so your life has just become even easier! 0/5 on the scale!
Pick up the Centaurs (c) further north. The reinforcement just keeps coming even if you really don't need them, eh? At the NE corner of this quarter you can visit the Yellow Keymaster Tent (yellow K), pick up a stack of Earth Daughters (d) and unlock the Blue Gate (blue G). What you get is the ring artifact of the Urgash set (enemy morale -2). Not bad at all! Now you are ready to report to the Seer at (8) to take on the last quarter.

The green aura = Microsoft certified copy of the official Seer Tent!
Fourth Quarter (NW)
You start at (8'). According to the map file that I opened in the editor, there should be a small stack of Wyverns just west from here, but in my game I didn't see anything. Follow the grass path SW to see the paved roadd. If you are like me who actually picked up a ton of resources along the way as a potential quest requirement, go SE from here to sell them all to a Trading Post (T). This is your only chance to cash out.

Follow the paved road NW you can see an Artifact Merchant at (9). I was able to buy what Kujin missed back in mission 2 - the Dragon's Eye Ring. (I was able to buy it again in the next mission, by the way.) Just south of the merchant is yet another stack of Centaurs (c) joining you.
With so many shooters it is now a good time to tackle the optional quest - to find a Sunken Temple which I have marked with a red X. The path leading to the temple is just east of the Artifact Merchant. The Sunken Temple is essentially a Dragon Utopia guarded by something equally annoying. It is not difficult at all, and your loss will be reasonable for the rewards. I got a 1000G/turn Gold Bag here among other useless artifacts, but a lot of cash and EXP points.
Follow the paved road west, and you can see a Stable and yet another Seer Hut (10). You can spend a little cash here to recruit 40 Chieftains. That's right, the Chiefs are here! Now your Centaurs are firing till their arms drop! By the way, there might be yet another group of Goblins to pick up by the Staple according to the map file, but I don't remember seeing them myself. Or maybe there are just too many free stacks joining, so they fail to impress me anymore.
West of the hut you can find the Yellow Gate (yellow G) that hides the other Urgash artifact (helm). Follow the path north and you will see a Memory Mentor (11). If you have missed the Mentor in mission 2, here is another chance to straight Kujin up. East of the mentor you can pick up the last stack of reinforcement, Warriors (w), and finally upgrade units in a Hill Fort (12). Now if you have any cash left - hold on to it. (see last paragraph, about the last battle)
You are now ready for the boss fight. Just follow the path north, and climb up the hill to the west. Alastor will encounter you with an Infern... inferior army. No kidding for a mission 4 boss! In my game the fight was over right after Kujin casted her first war cry. What a joke!
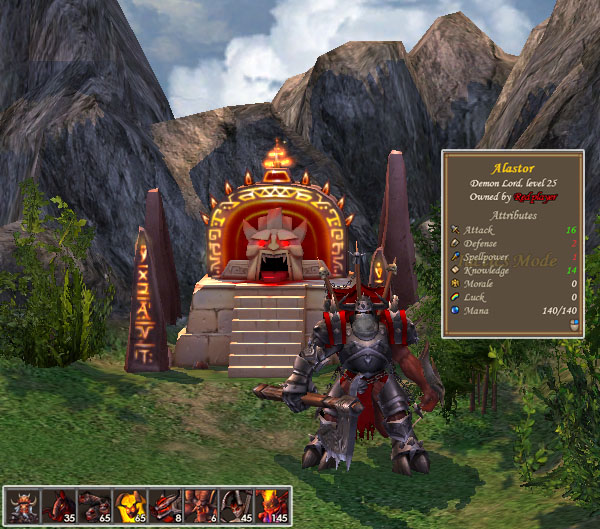
I think he belongs to mission 2. No wait, he is too weak for that.
Preparing for Kujin's Final Battle
It is actually a good thing to have a lot of cash left over!
Believe it or not, it will be Kujin, not Gotai, that appears in the final mission (in the Academy Campaign) of Tribes of the East. Currently, the game will give Kujin an army and directly march her towards the enemy. She does not even have a chance to adjust artifacts equipped by default (and the game makes very bad choices!). We will discuss more details in the C3M4 walkthrough section.
Therefore, this Memory Mentor in C2M4 is actually your last chance to tune Kujin for her last appearance. Let's throw away any skill that is not helping and go for the useful ones. First, forget about the Ballista - you won't even have one! Going for the ultimate is not a bad idea, although the armies are so big that your starting Rage Points won't last very long. Shatter Dark won't disappoint you as Kujin's opponent will cast them non-stop! Don't leave Kujin without Luck - Magic Resistance - you never know when you can dodge another annoying Frenzy. Barbarian's Luck is not necessary, because your enemy does not cast any damaging spell. Other than that it is standard Might Build. Here comes an example:
- Expert Blood Rage: get rid of Powerful Blow and keep the other two
- Expert Attack: Battle Frenzy, Retribution
- Expert Leadership: Recruitment, Aura of Swiftness, Battle Elation
- Expert Luck: Expert Luck: Magic Resistance
- Expert Shatter Dark: Detain Dark
You should still have about 4 skill points left. Either Expert Enlightenment or Expert Defense will do well. Have fun!
Page 6 of 23