 As you might expect, maltz went through the Haven campaign of the Hammers of Fate expansion like a Paladin through a battlefield. He provides tips to complete the five scenarios at Heroic with the best character development, and includes screenshots with funny captions. Let him tell you about the adventures of Godric's daughter, a character we didn't really expect to see again...:
Freyda's Dilemma: Rebels | Suspicion | Duncan | Negociations | Choices
Special thanks to Caradoc for the proofreading. The next campaign, Wulfstan's Defiance, featuring the Fortress Dwarves, is already under way.Freyda's Dilemma: Rebels | Suspicion | Duncan | Negotiations | Choices
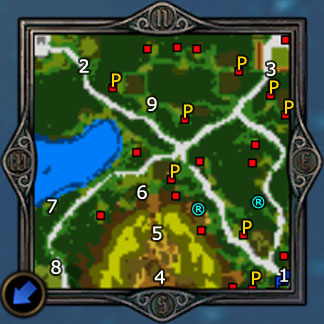 Mission 1 - Rebels
 Map Size: Small
Carry Over: Freyda (and Laszlo)
Level Cap: 10
Difficulty Index: 2/5
Primary Objectives:
- Destroy Lord Caldwell's rebel camp
- Destroy Archbishop Randall's rebel camp
- Help Haven troops out from encirclement
- Seize all (8) Peasant Huts
- Freyda and Laszlo must survive
- Elf druids (mandatory)
- Eliminate the rebel units
February 11, 2007, Patch v2.1
Welcome to the Heroes of Might and Magic V: Hammer of Fate walkthroughs. There are three campaigns in total, each containing five missions. Hopefully you will find these walkthroughs useful, and entertaining from time to time.

In the first campaign of the expansion, you again control a female Haven hero - Freyda. You might recall Freyda from the last mission of the Necropolis campaign, where she was taken, by Markal (you), from a prison just east of Newpost. One day later, she was killed and turned into a Spectre. Wait, maybe that happened after the HoF script was written.
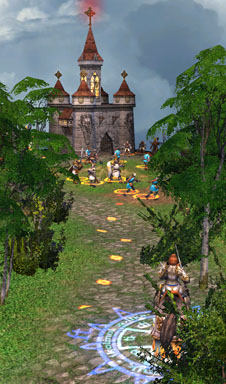 As usual, the first mission is just a warmup. You start with two heroes, Freyda and Laszlo, in the SE corner (1). You can concentrate battle experience on Freyda, because Laszlo will not stick for long. I used Laszlo to run errands, such as flagging buildings. There is no town to be developed, and no enemy hero to fight, either. Depending on the difficulty level, some neutral stack might require some tactics. You may spend cash to recruit units from various creature buildings on the map, but extra hirings are not necessary even on heroic.
 There are quite a few main objectives and sidequests. Your eventual goal is to take out two hordes of stacks on the NW (Randall, 2) and NE (Caldwell, 3) corner of the map. These stacks appear to be fighting each other, with funny animation and sound effects throughout the mission. Before that, there are quite a few other quests to pursue.
Which skills are useful for Freyda in this campaign? As with Isabel and Godric back in the original HoMM5, Luck and Leadership are very powerful passive skills for a Might (army-oriented) hero. Freyda starts with Attack and Light Magic, so it will be nice to work towards Retribution (requires Expert Training from Counterstrike, works great with Leadership) and Master of Wrath (Freyda's specialty, more powerful Mass Haste when her level gets high).
Starting from mission 3, you will have access to Mage Guilds in towns, and eventually Freyda will visit plenty of Level-5 Mage Guilds. Resurrection is always useful for a campaign hero. Also, since Haven Mage Guilds specialize in both Light and Dark magics, Dark magic is another nice pick for Freyda.
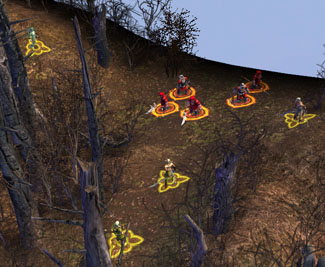
Start by combining Freyda and Laszlo's little armies. After taking out the first stack of Conscripts, you start getting ambushed by invisible Elves. These ambush points are fixed, so one will always trigger if your hero steps on an invisible "ambush trap". The ambushes are not particularly harmful, though. You only lose 20 Conscripts / Peasants, 10 Marksmen, or 3 Imperial Griffins, etc. If you are really stingy about troops, approach these ambush points with a hero leading just 1 peasant. You won't lose anything this way (maybe a little dignity).
 Soon, you also receive another primary objective of flagging all Peasant Huts. Their locations are all revealed on the in-game map (marked by yellow P above). You have to flag them all to complete this mission, so don't miss any on your way.
 A few days later, you will receive yet another cutscene and primary objective - to rescue a group of encircled reinforcements, located on the center south (4). They are the Renegades, which are essentially alternative Haven unit upgrades. They have slightly different stats from the regular upgrades and they love to wear red. Depending on difficulty, you will receive different number of reinforcements (210-300 Enforcers, and 70-100 Crossbowmen). The higher the difficulty, the smaller the number.
The reinforcements are quite helpful, as your regular Haven units desert you on any random day throughout the mission. A similar thing happened to Agrael and Isabel in the original game (C2M4 and C3M5, respectively), but this time there is no mule hero to give your troop to before the end of the turn. The number of troops you lose is comparable to an Elf ambush.
However, there is another trick to avoid losses. You can get another random desertion result (including NO desertion at all) by splitting / merging stacks before hitting End Turn. I will let you to decide whether this is considered Cheating.
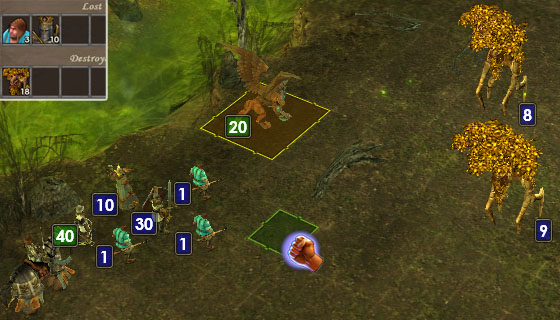
On your way to the reinforcement, there is a stack of Ancient Treants blocking the path (5). They are a headache on heroic, but you should be able to cut your losses by splitting out several single Peasant stacks to buy some turns. Imperial Griffins are handy here, but you have to be a little careful about the battle dive timing.
After clearing the Treants, proceed south and meet a stack of Master Hunters. There is no free lunch (reinforcement), right? Actually there is. Proceed to the battle with nothing but your Imperial Griffins and 6 stacks of 1 Peasant each (give the rest to Laszlo). As soon as the battle starts, battle dive the Master Hunters and rush forward your Peasants. These suicide pawns will use up master hunters' iniative (so they don't just Wait, which only uses up 50% of their iniative), hence your Griffins can battle dive safely in between.
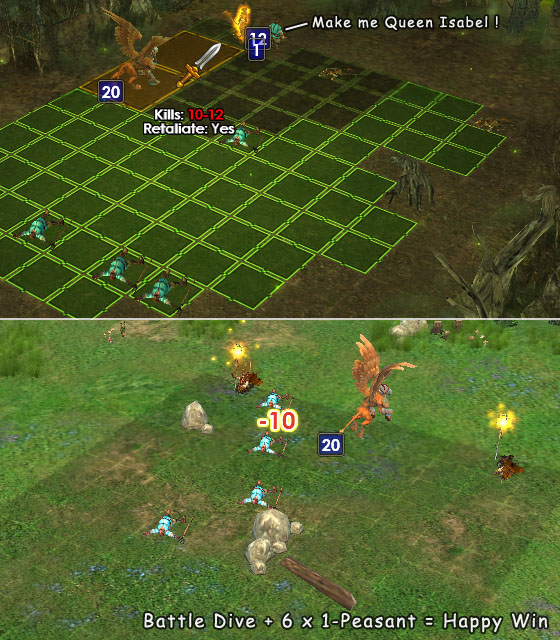
By the way, there is a Witch Hut (6) nearby. You may be able to learn a useful skill from it.
To make yourself more efficient, now split up your two heroes. Let one of them visit the Seer Hut (7) to trigger a necessary sidequest - killing some Elder Druids. You can find these Druids south of the Hut, at (8). With the same tactics described above, you can easily dive these deer heads to death with an insignificant loss of Peasants. After the battle, make the other hero visit the Seer Hut again and choose "Complete Quest" to claim your little reward on this hero (not the one fighting, though). There won't be any Elf Ambush from then on, but troop desertion still happens. You now have free access to the bases of Randall (2) and Caldwell (3).
Note: You can't skip this sidequest. If you directly rush towards Randall's church (2), you will be forced to turn back because "the Sylvan Ambush is too powerful".
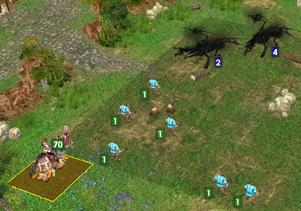 You are now ready to finish this mission. Let's start with Randall's church, which is closer. Although there seems to be quite a large number of stacks in Randall's base (2), you only need to fight one battle to take them all out. This battle is ridiculously easy, even on heroic. Each stack you see on the strategy map only represents a few units.
 Your final goal is Caldwell's base at (3). If you follow the paved road back to the center and go NE, you will have to break through a formidable stack of Archangels. That's probably not a good idea on higher difficulties. An easier way is via a smaller stack of Spectral Dragons at (9). If you have read the famous "Dragon Utopia" tactics on this site (it is also about single Peasant stacks), you can do very similar things here. Easy victory!
By the way, there is an optional side quest of "Elminating all Rebel units". You have to defeat all of the Haven stacks guarding the creature buildings, where you can recruit. In my game, I completely ignored them, because I could already push Freyda to the level cap without extra battles.
Like Randall, Caldwell is not actually a regular "Hero". Like his model in the cutscenes, he is just one of the Champions. However, Caldwell has a much larger stack of units than Randall. This is the last battle of the mission. It seems that the size of Caldwell's army is not consistent each game. Here is what I had in my game, and some tips of this battle.
Have you visited the two stat boosts, marked by the blue (R)?
 Are you a friend or relative of Freyda? Watch out.
 Freyda's Dilemma: Rebels | Suspicion | Duncan | Negotiations | Choices
Read full article...

